Removing Veneer & Refinishing Furniture
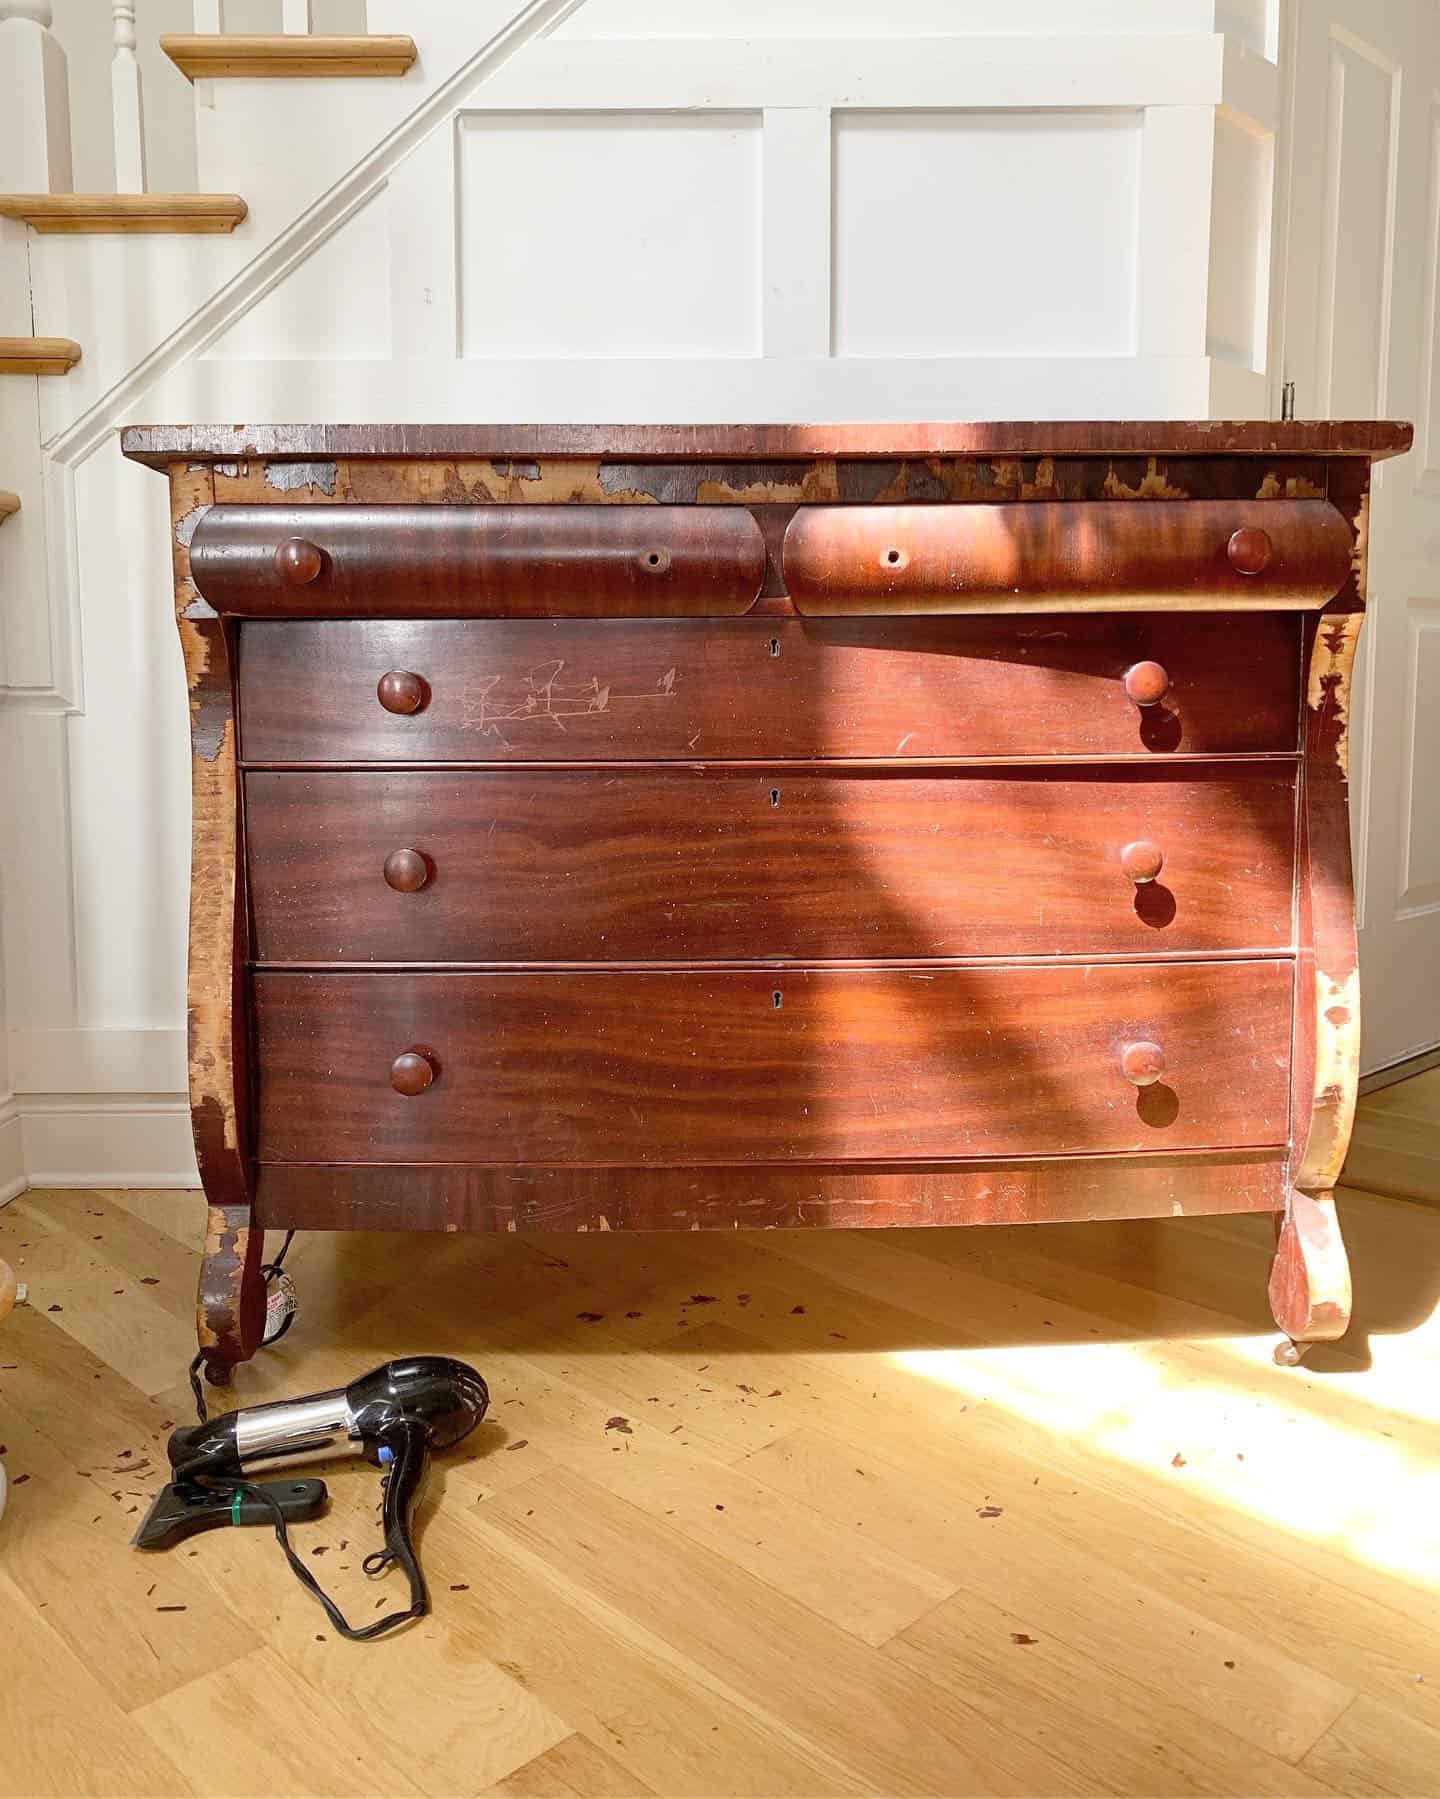
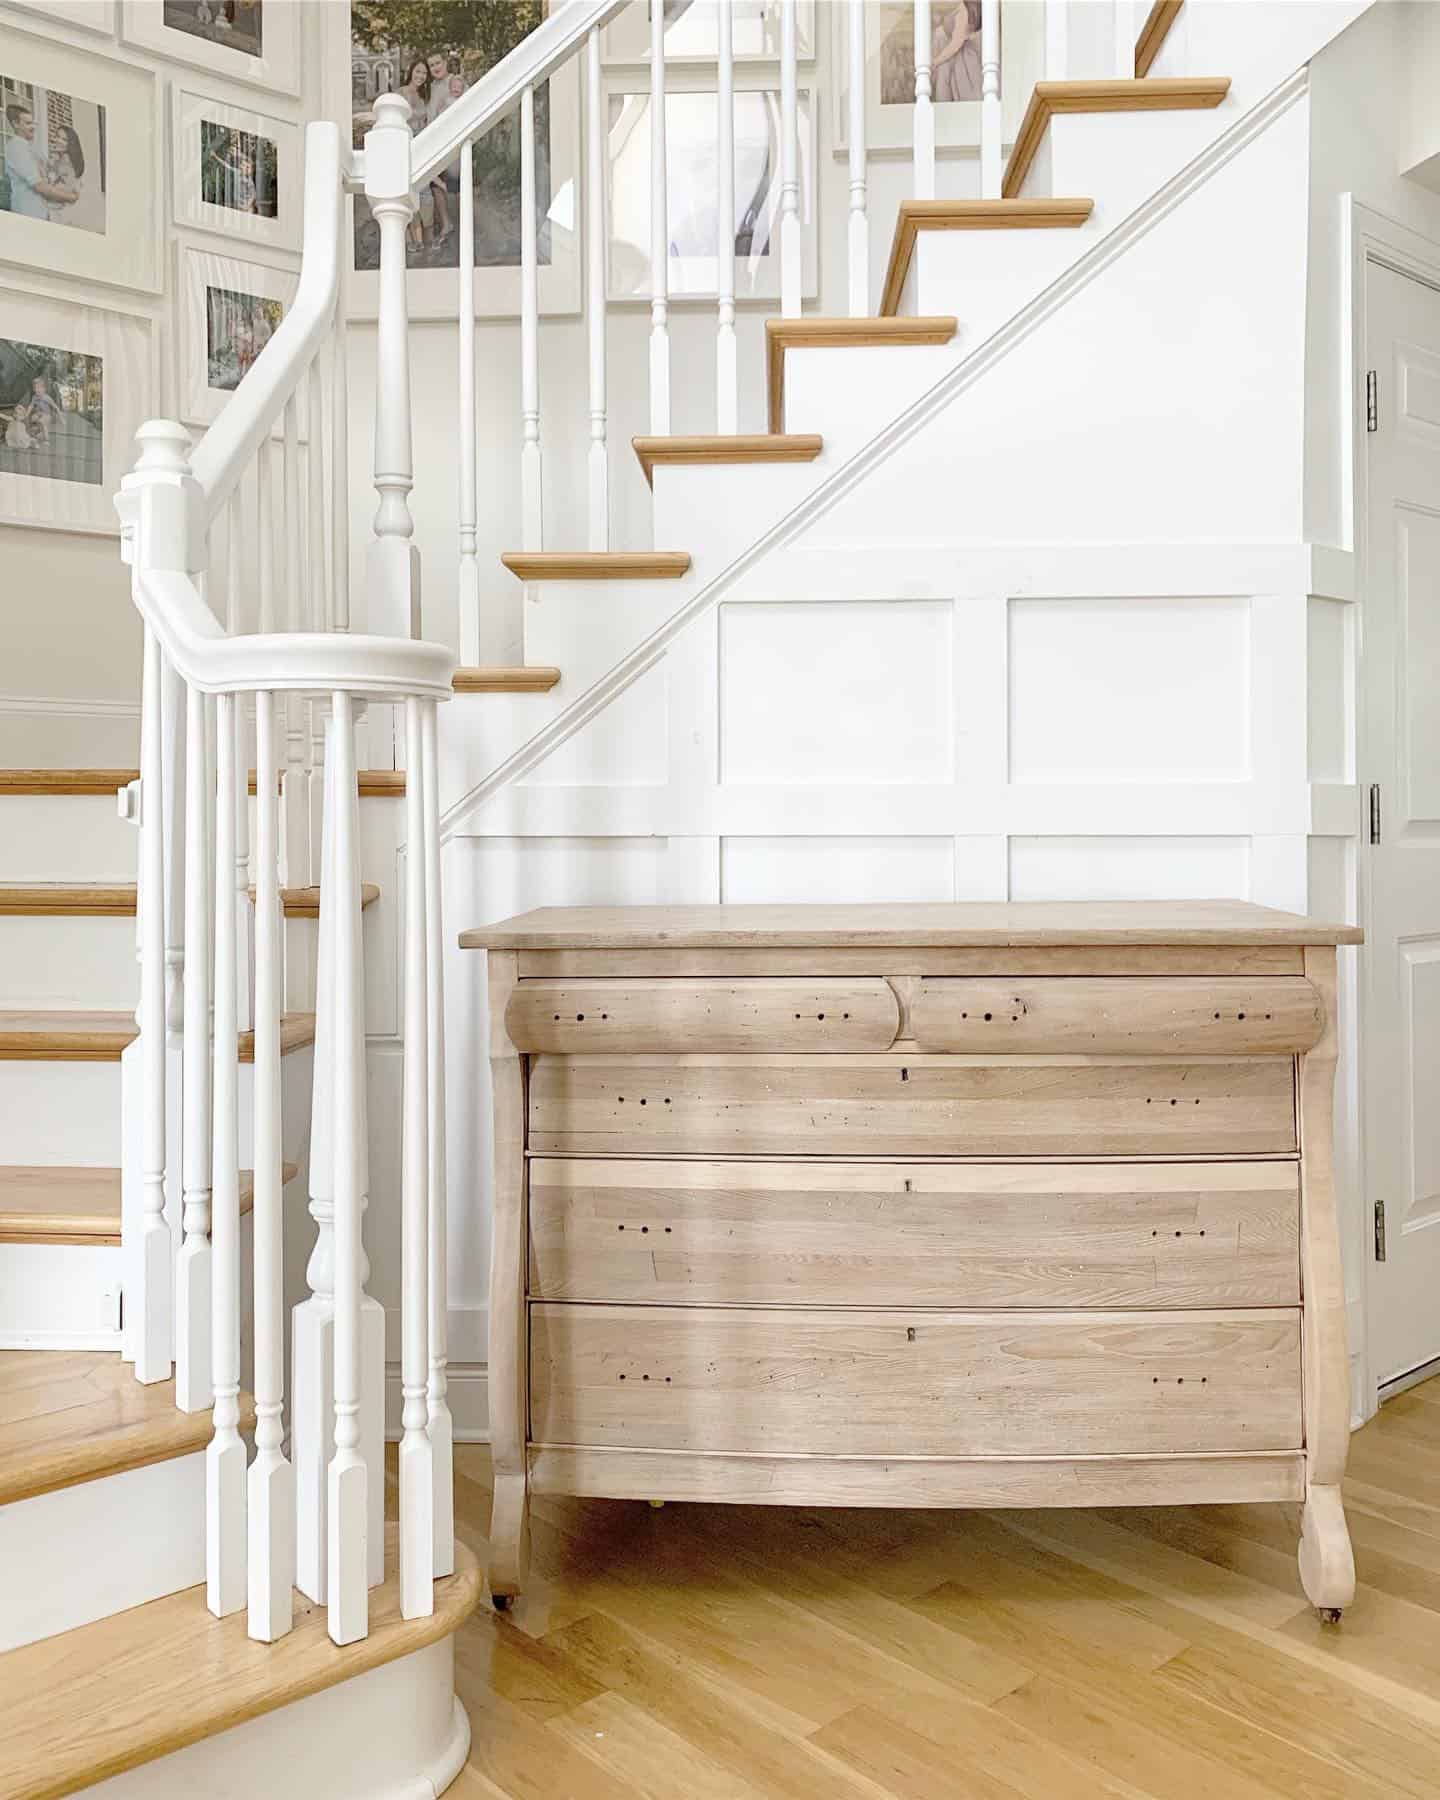
The Empire Chest

My husband recently said that two things do not mix, me being pregnant and me “stopping by” a secondhand store. I’m not sure if it’s just the drive to get things completed, or a spark of creativity when pregnant, but I have been in overdrive the last several months with these furniture projects. I’m introducing you to my latest piece, the empire chest.
After doing a quick search on Antique Trader, it was estimated that this piece is from the Empire period (1805-1830). Originally I wanted to paint it for our foyer, but as veneer started chipping away, I had the wonderful idea of removing the veneer and attempting to “strip” it. This project quickly turned into a monster. I tried several different techniques for removing veneer. After several cuts, swear words, and a horrible mess in my foyer, I opted to take it out on the porch and try an electric sander.
This is not a tutorial or meant to be a tutorial. This is how I completed the project, what worked for me and didn’t work for me, tutorials I used, and my take home messages for removing veneer.
This post contains outside links to websites not managed by The Coastal Oak. The Coastal Oak is not responsible for information gained on outside links. This post also contains affiliate links, with commission from your purchases.

How do you know if a piece is veneer?
You may find yourself asking, what is veneer?
- Revolve Furnishings sums it up well in the their post, “Wood Veneer vs. Solid Wood.”
- Professor’s House also has a great description in their post, “How to Tell if Furniture is Made from Real Wood.”
- This piece was easy to identify as veneer because it was already peeling and chipping badly when I found it in the store.

How to remove veneer?
So you’ve found a piece of furniture with damaged veneer, what do you do next? For me, it was a question of painting the piece or refinishing it. To paint the piece, I needed to do something about the damaged veneer because it would be obvious under the paint. As I started chipping away at the veneer, I just couldn’t resist the idea of another raw wood piece of furniture in my home. I scoured the internet for hours and found several methods for removing veneer.


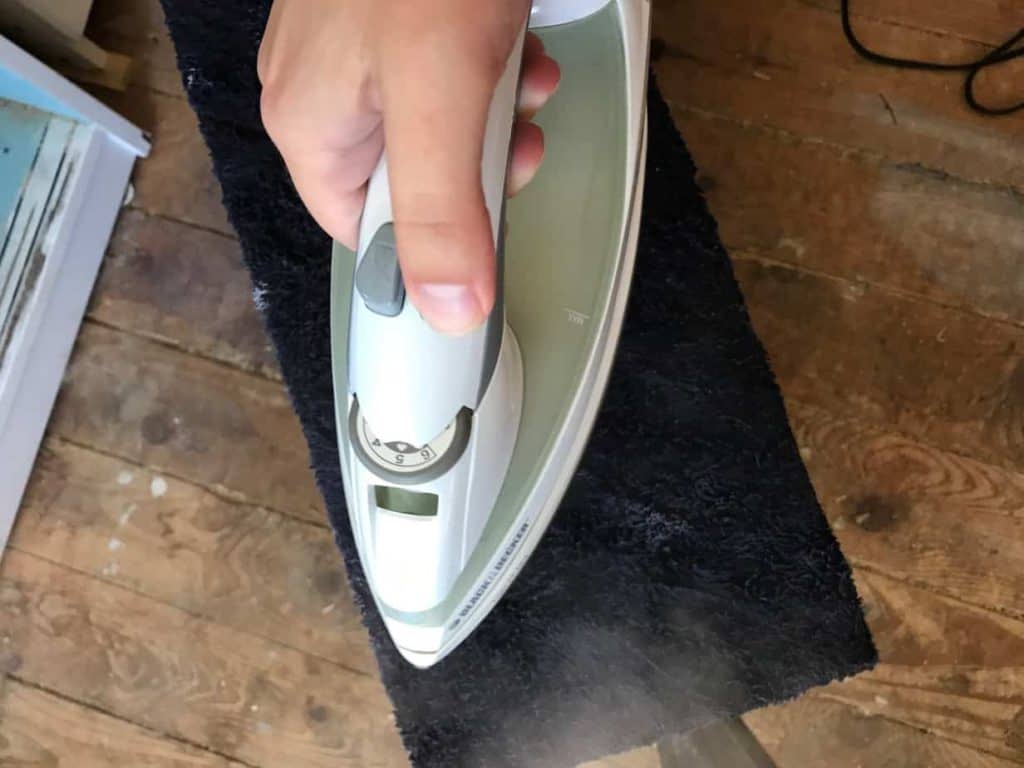
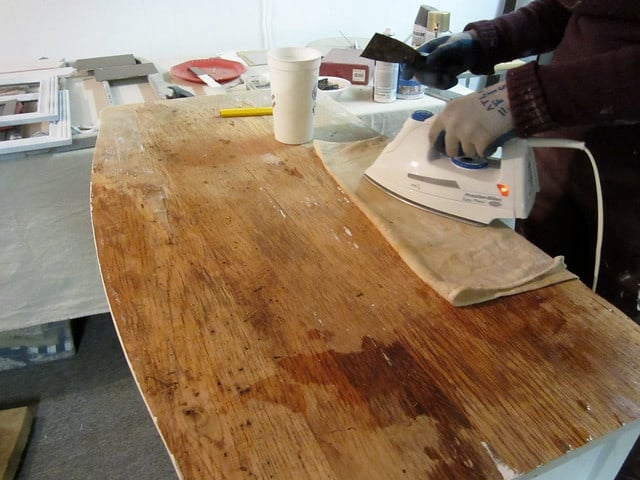
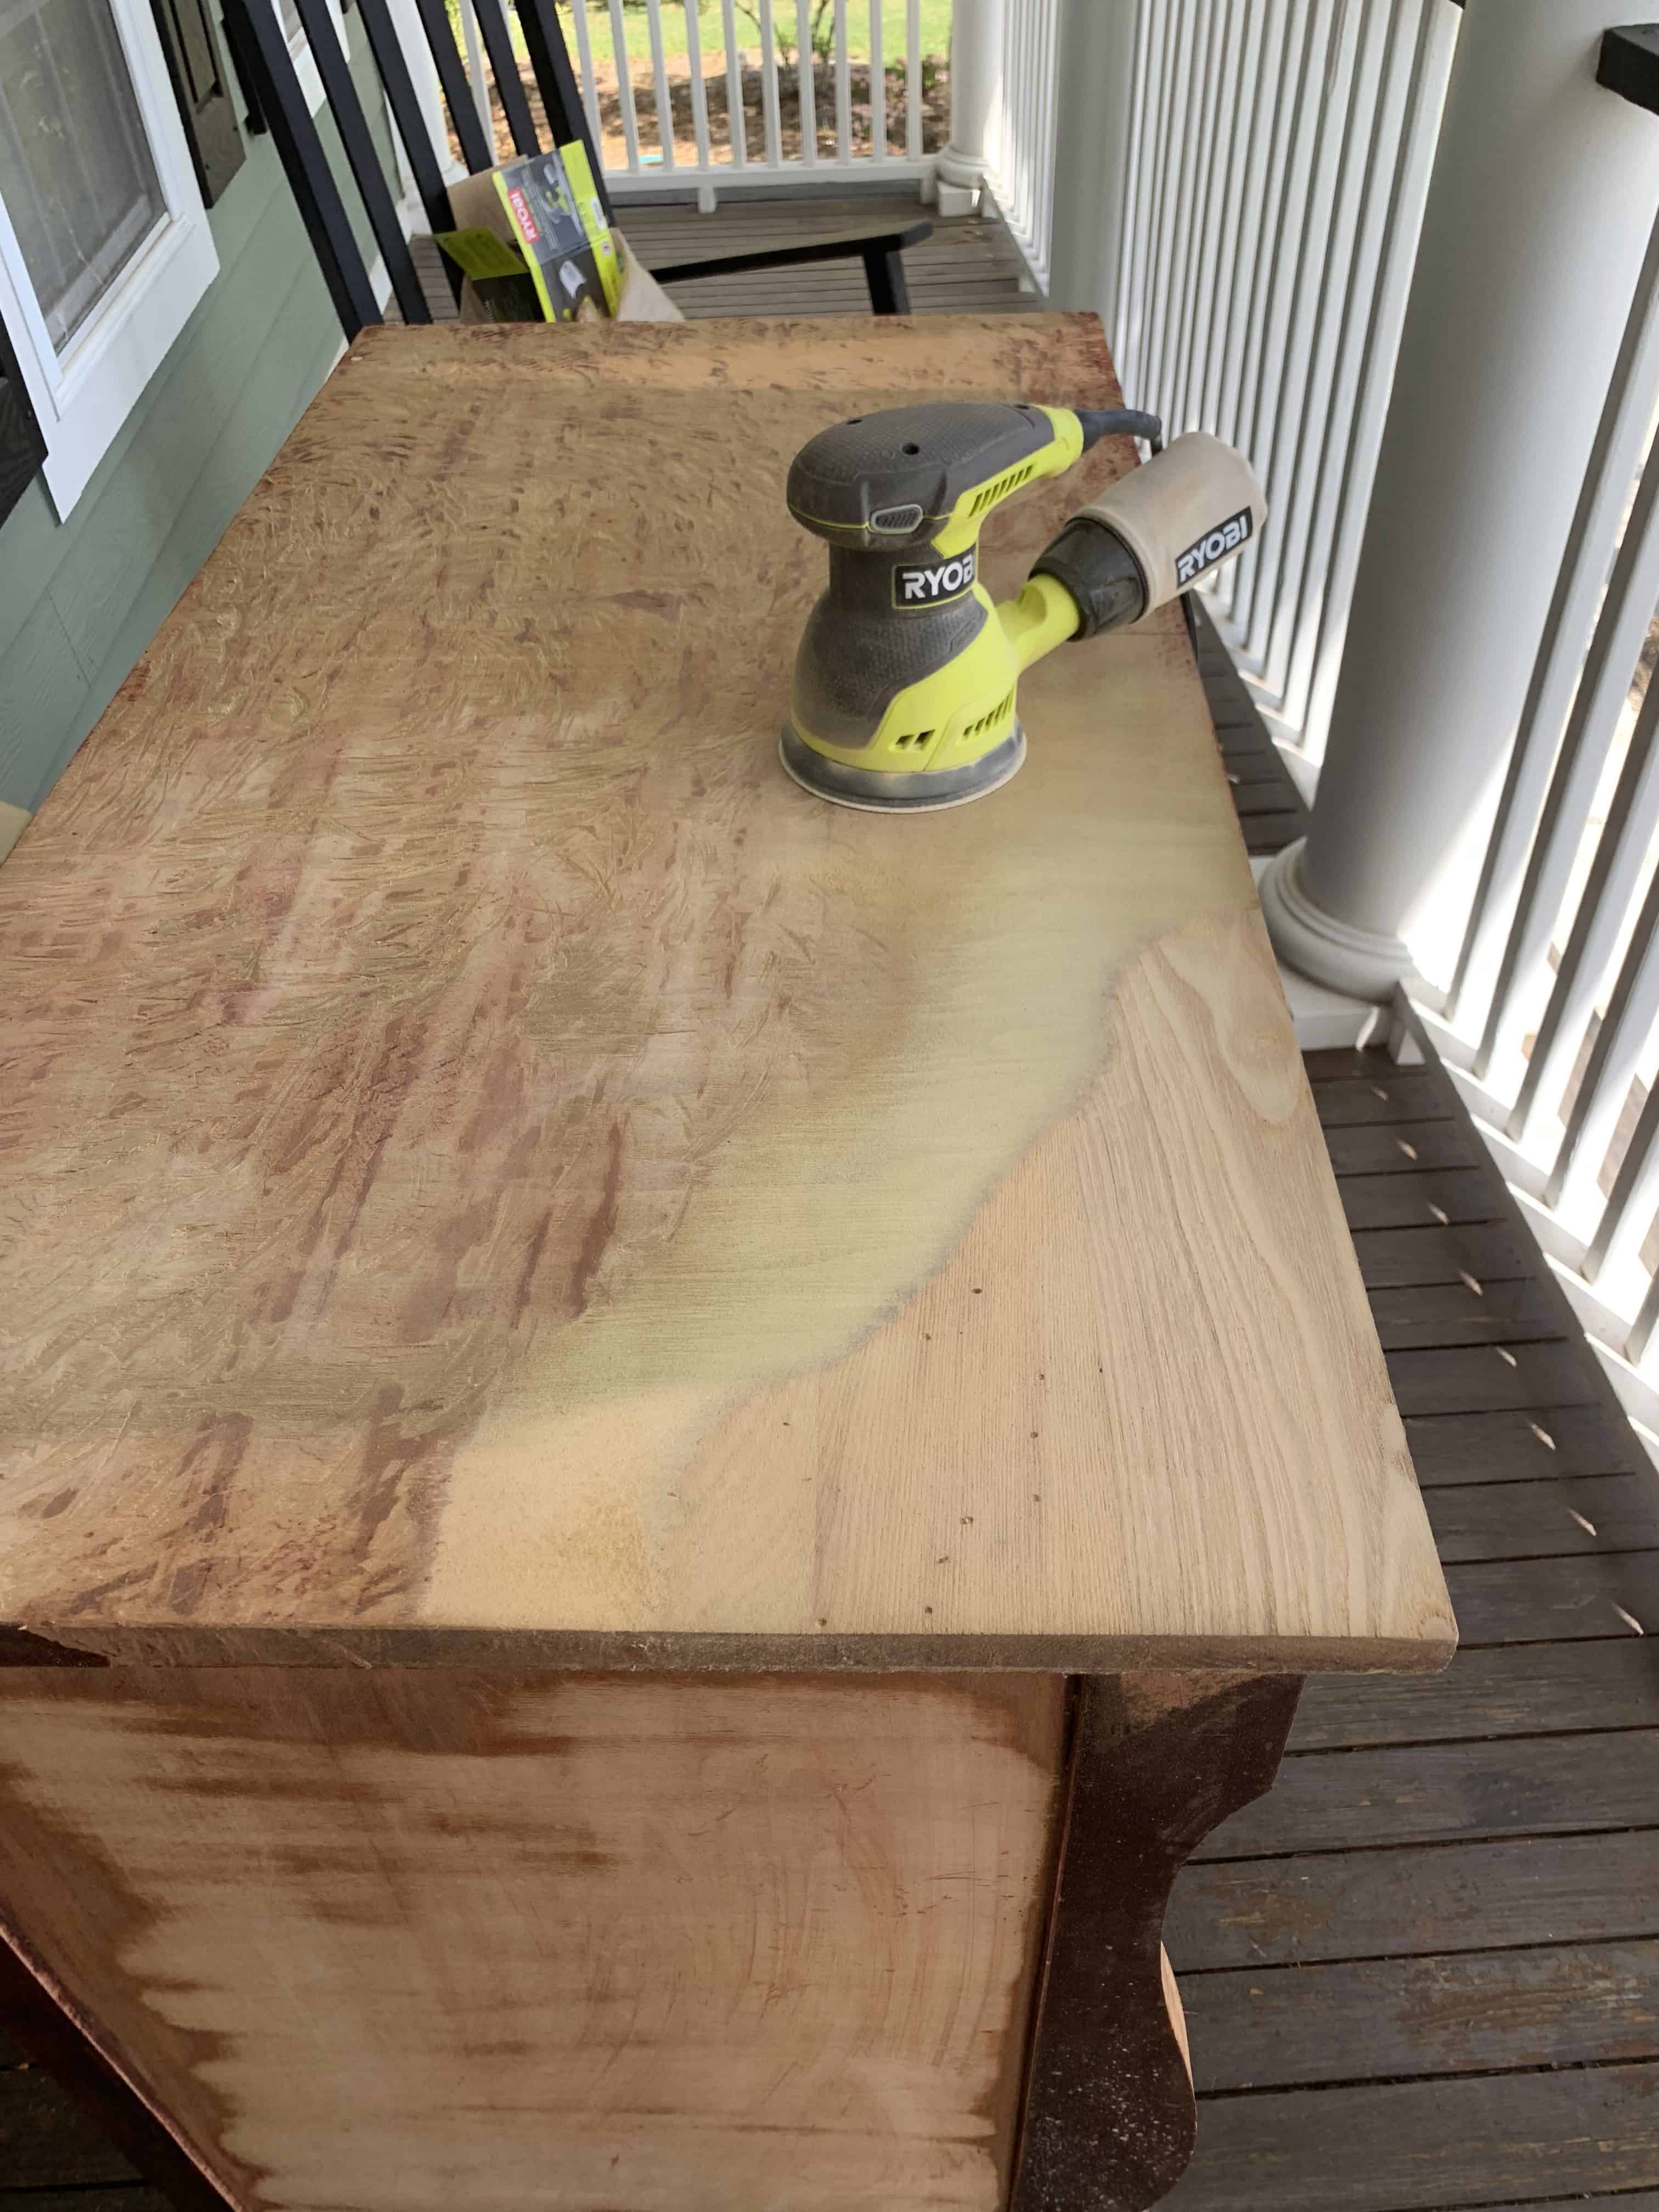
I started with what seemed easiest, using a razor and chipping it off, and got no where. Then I tried using a damp towel and iron, to create moist heat, and loosen the glue underneath the veneer. Small pieces would break off, but the majority would not budge. I tried a hair dryer for high heat. Nope. I borrowed a heat gun from a neighbor. All this did was catch little pieces of veneer on fire. I was at the end of the rope and ready to pitch it to the curb. Finally, I tried an electric sander and POOF, hours and days later, I sanded through all of the veneer.
Here are useful links for removing veneer:
- Or you can use my method and sand through it. I do not think there is an “easy” way to remove veneer, but all methods are worth a try!
Sanding Through Veneer
I gave up on all of the methods above and pulled out an electric palm sander to complete the job. I used 60-grit sand paper to get through to the raw wood, then used 120-grit and 220-grit to smooth out the piece. You need to use caution when using this method because once you get through the veneer, you could scratch the underlying wood with 60-grit paper. Also, make sure you’re through the veneer, you may hit a greenish toned wood, but that is actually the veneer and glue, and you will need to keep going.


Power Tools Used for this piece
- Ryobi 2.6 Amp Corded 5 in. Random Orbital Sander
- Dremel 200 Series 1.15 Amp Rotary Tool
- Ryobi 0.4 Amp Detail Sander
Bleaching Technique
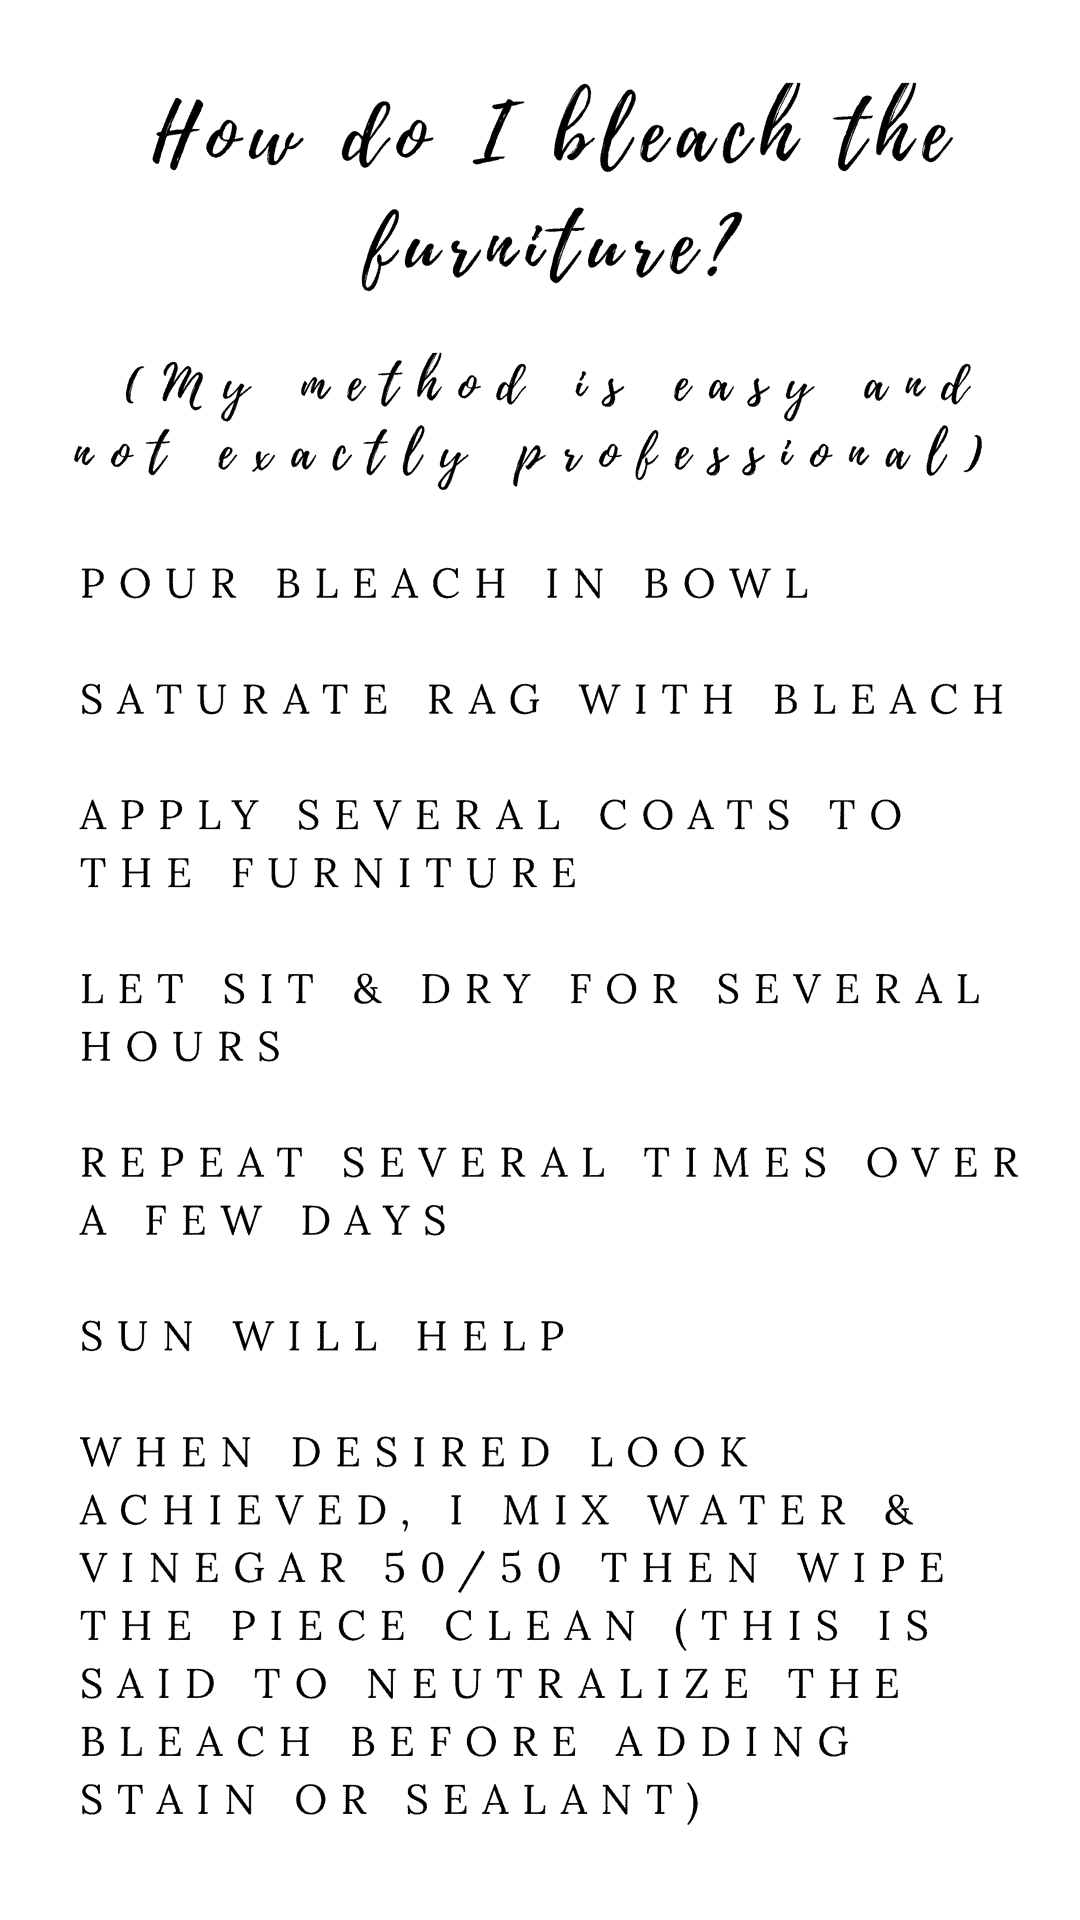
There are several different methods for bleaching a piece of furniture. I prefer to use household clorox to keep it simple. I have not tried the other methods, but here are a few links to tutorials.
Sealing

I’ve talked about this in my videos, but sealing a piece is my least favorite part of this process. It is easy, but I get frustrated when the sealant causes my piece to turn a few shades darker. However, you must seal your piece or you risk getting watermarks and stains. I am still searching for this perfect method or product, but here is how I currently seal my projects. Ways to combat this? Stain prior to sealing or whitewash post sealing.
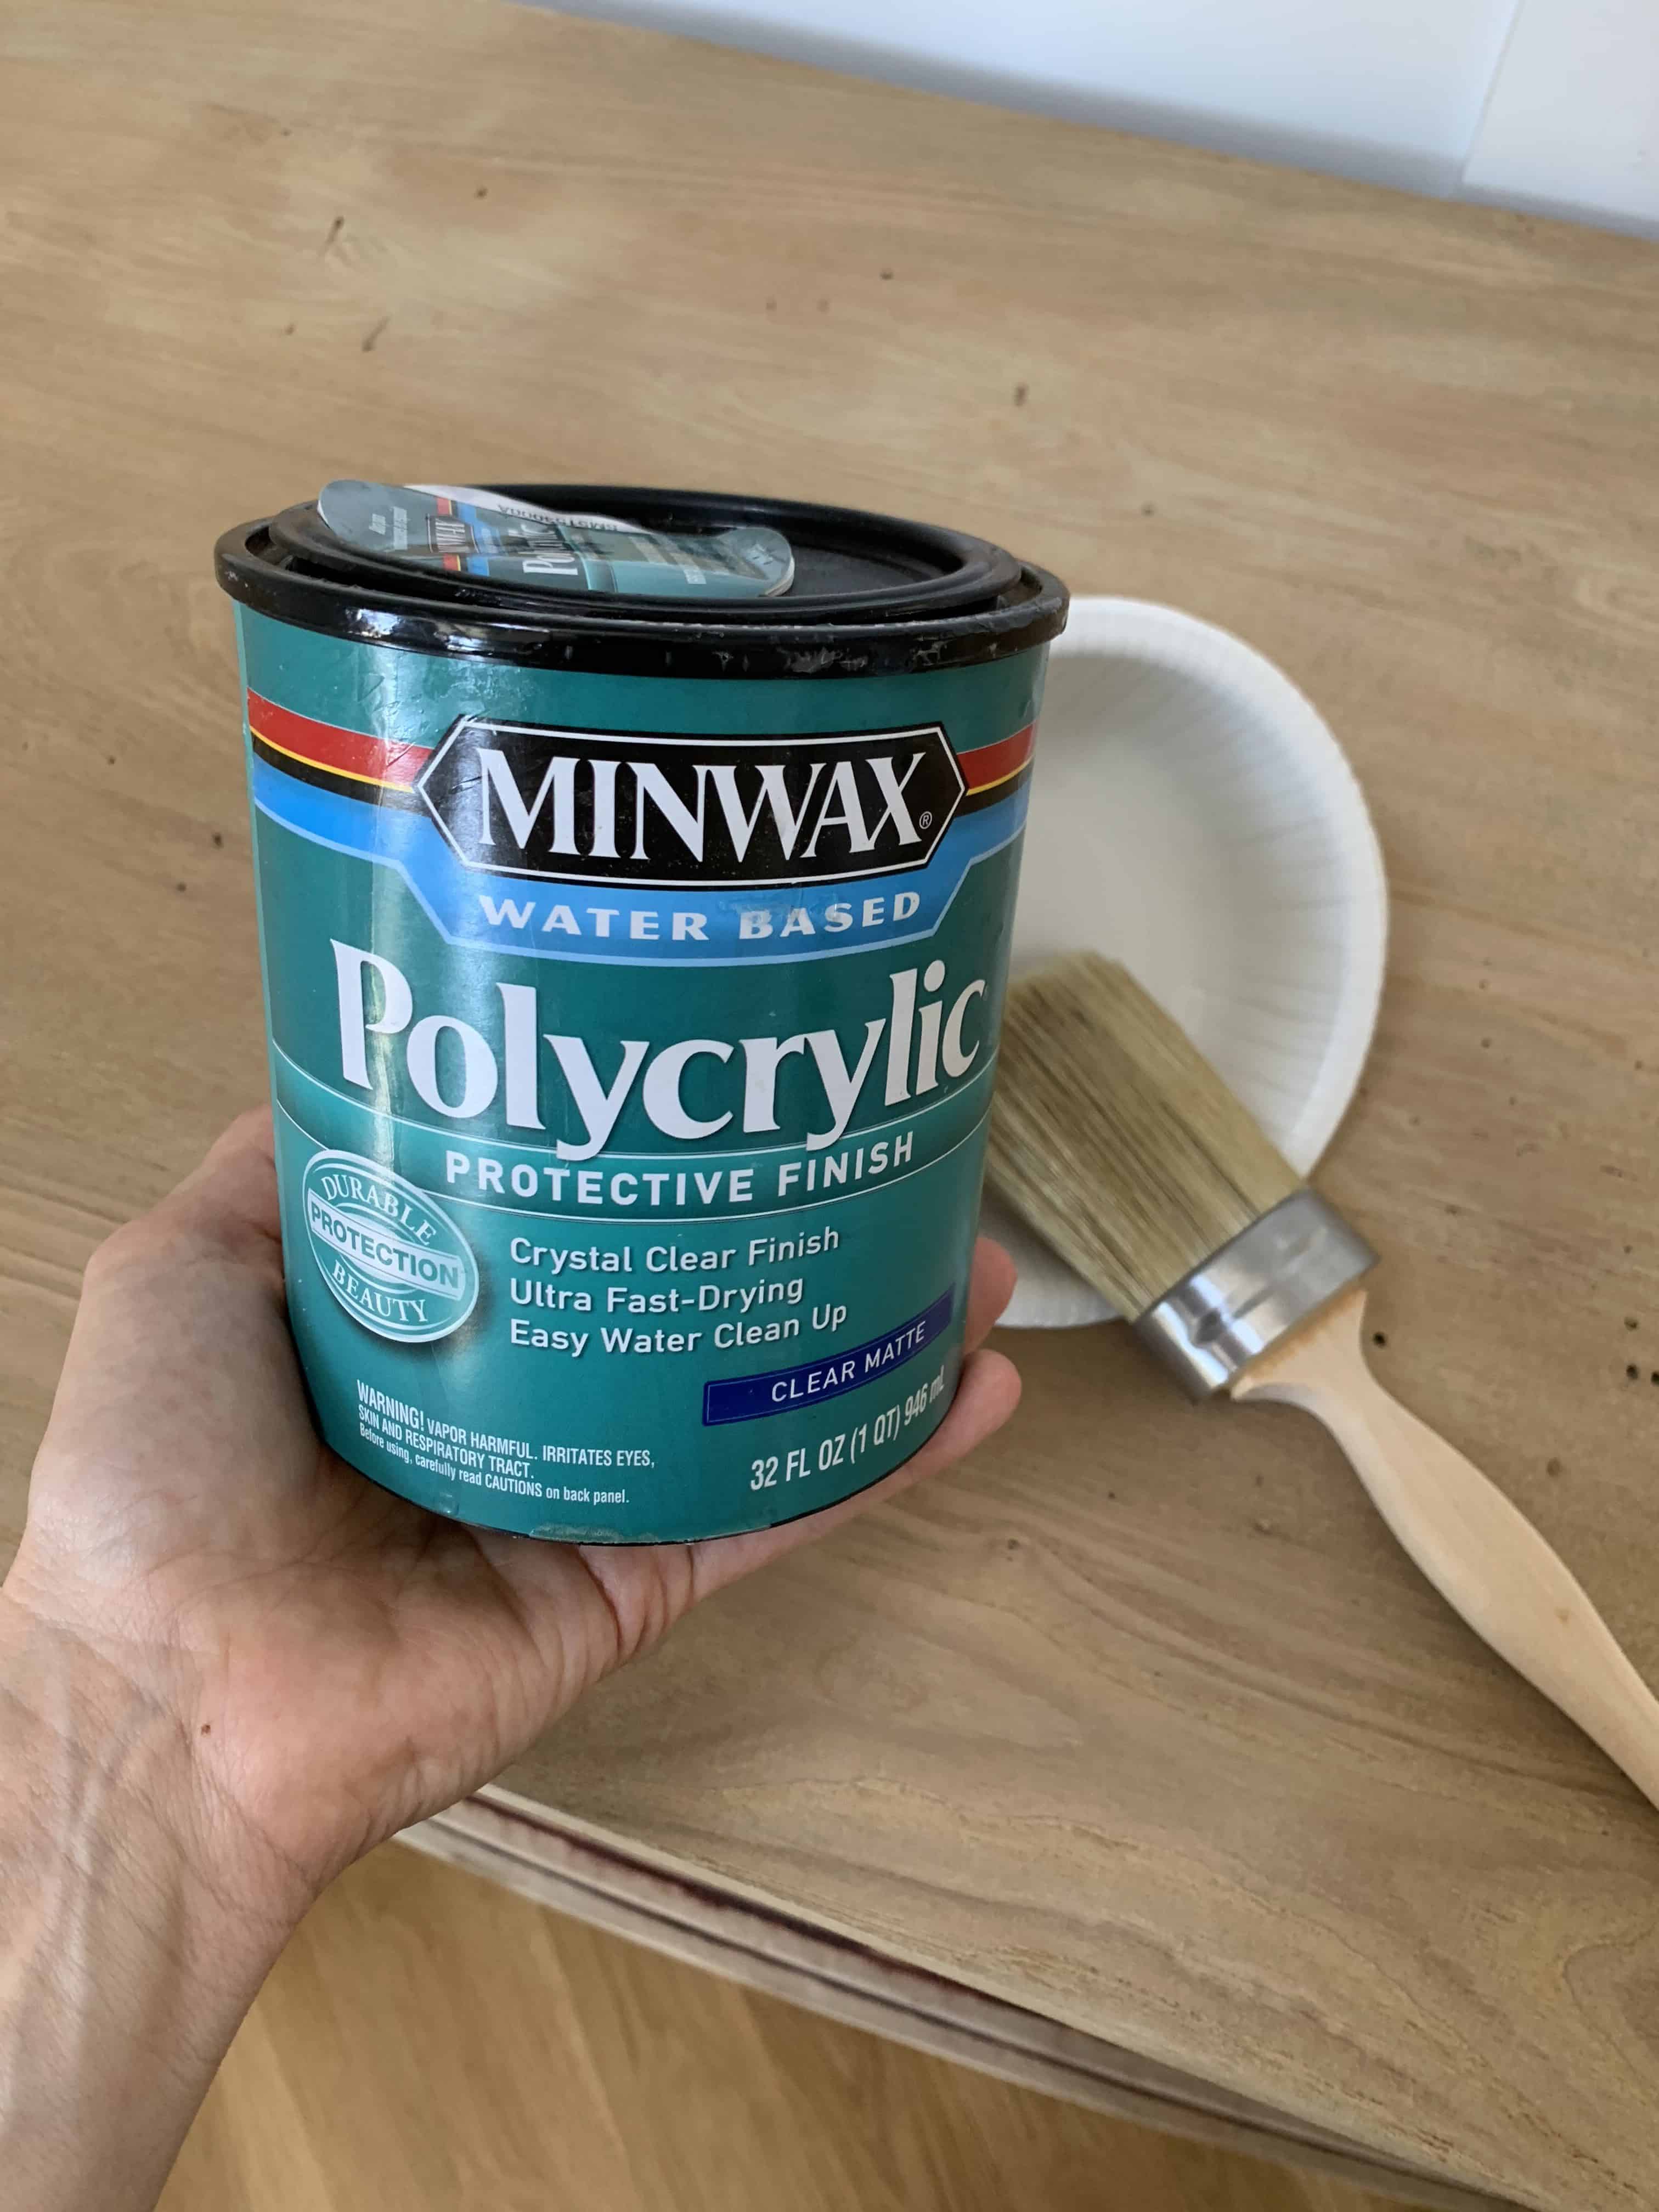
How I Seal Using Polycrylic
- Clean your surface with a lint free cloth, making sure no dust or debris remain. I typically run a vacuum over it to catch anything I missed.
- Open can and gently stir, it will appear white but don’t worry, it dries clear.
- Using a brush, apply a thin coat in one swift motion. Repeat. Avoid picking up and putting down your brush several times in the middle of the piece to avoid brush marks. I like this brush when working with sealing and wax.
- Let it dry for two hours. Lightly sand with 220-grit sand paper. Wipe surface clean.
- Repeat, Minwax recommends at least three coats. I typically settle with two. Let product dry for at least 24 hours before use.
Whitewashing
Like I said above, sometimes your piece will look darker or take on a different color tone following sealing it. I’ve found that THIS product helps counteract that. Here is how I simply apply the limewash glaze to the furniture.

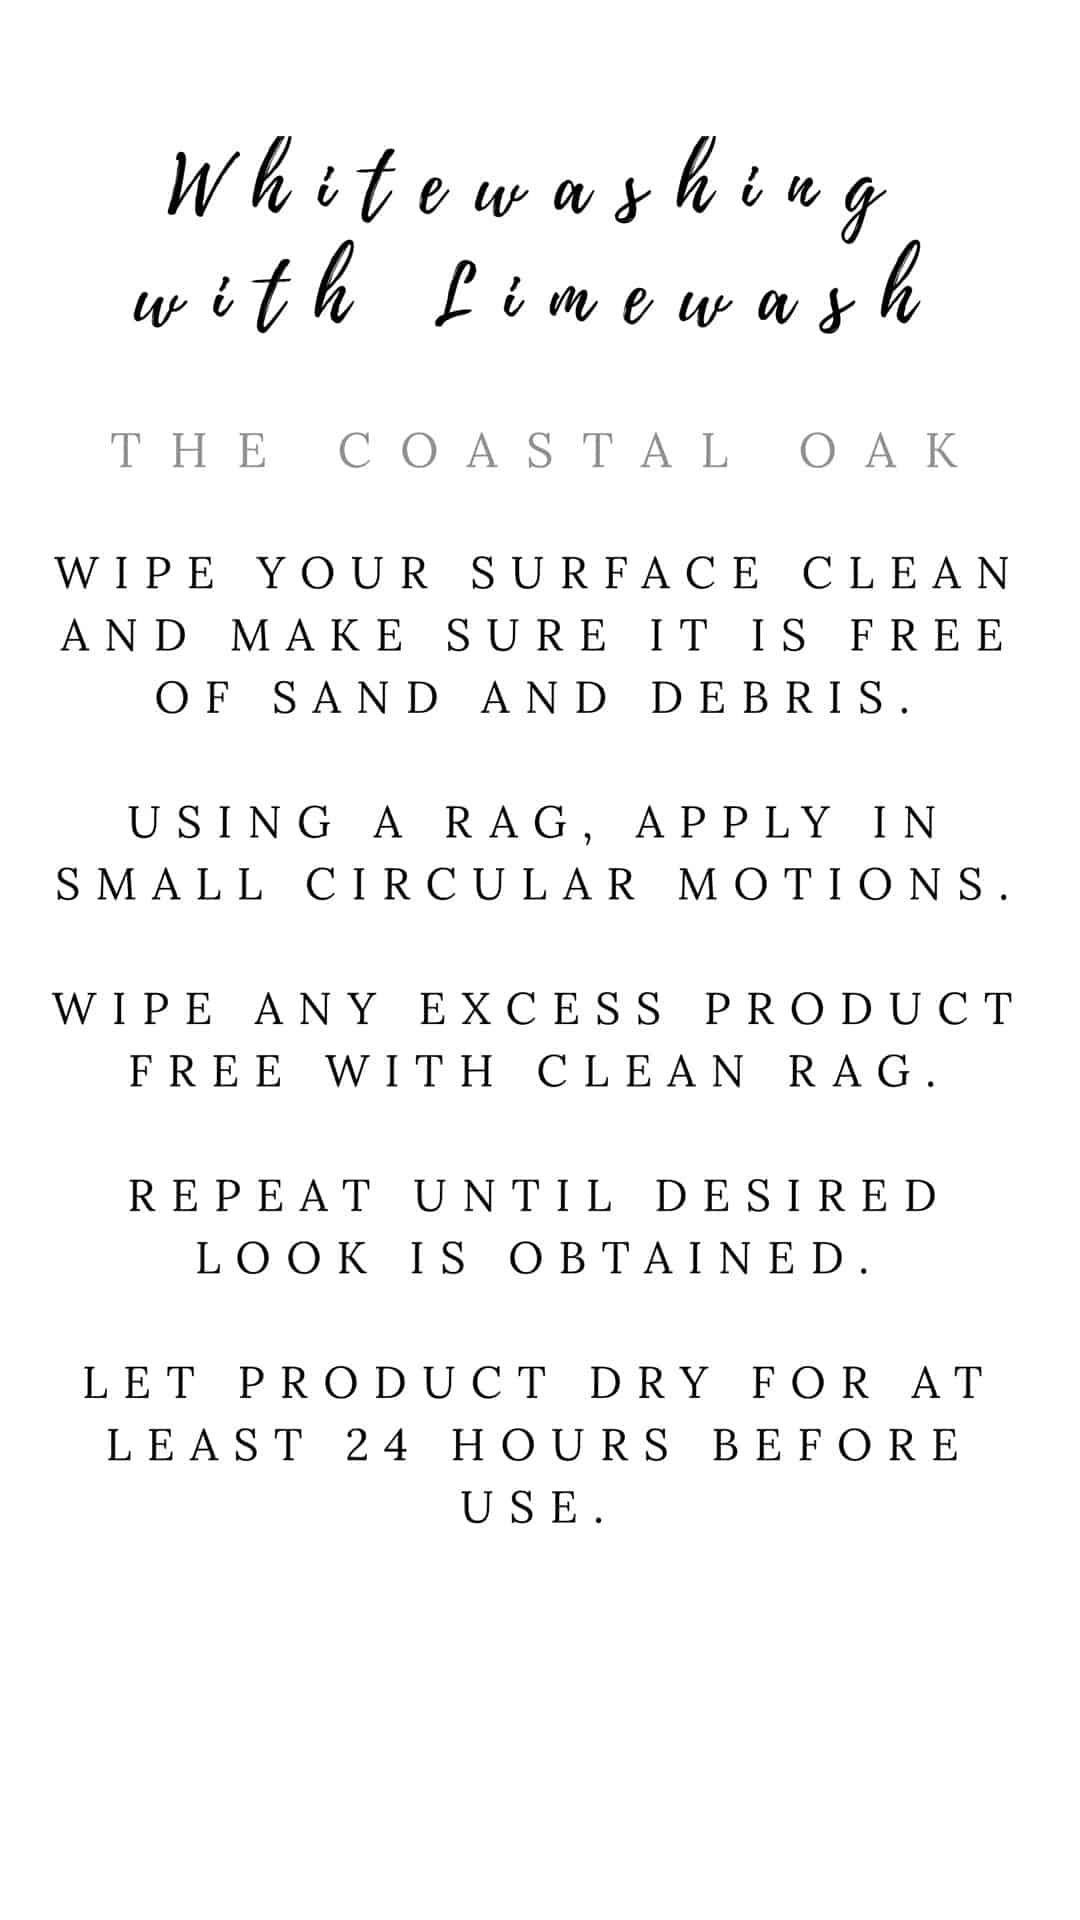
How to Apply Limewash Glaze
- Wipe your surface clean and make sure it is free of sand and debris.
- Using a rag, apply in small circular motions.
- Wipe any excess product free with clean rag.
- Repeat until desired look is obtained.
- Let product dry for at least 24 hours before use.
Take Home Points
Now keep in mind, not all raw wood is created equal. Veneer was often used to cover inexpensive wood. After refinishing several of these pieces, I have found that the older pieces have beautiful wood hiding beneath the surface. It’s a gamble, but I have not been disappointed to date. Looking back, even if I had successfully removed all of the veneer, there was a thick layer of glue hiding on top of the raw wood, and I never would have discovered the treasure underneath.
Stay tuned for more, I refinished three more dressers following this piece. Two of them are featured in my post “Shared Kid’s Room.” I will share how I did those soon, and you can always get a sneak peek on my Instagram page!


