Shared Boy & Girl Kid’s Room

The Mini Shared Boy and Girl Bedroom Reveal

With baby number three on the way, we decided to move my son and daughter into the same room, freeing up the nursery for our newest addition. This will leave a shared room for our guests and office. I know some people are hesitant to put a boy and girl into the same room, but it works for us! My son will be five in September and my daughter is two. We plan to move my son into his own room again in a few years, with our newest addition taking his place in the shared room for a few years. I may have lost some of you there, but just know it’s totally working for us right now!
This post contains affiliate links, which means I may make a profit from your clicks and purchases, as always you can read my full disclaimer here.
Planning Out a Shared Boy and Girl Bedroom
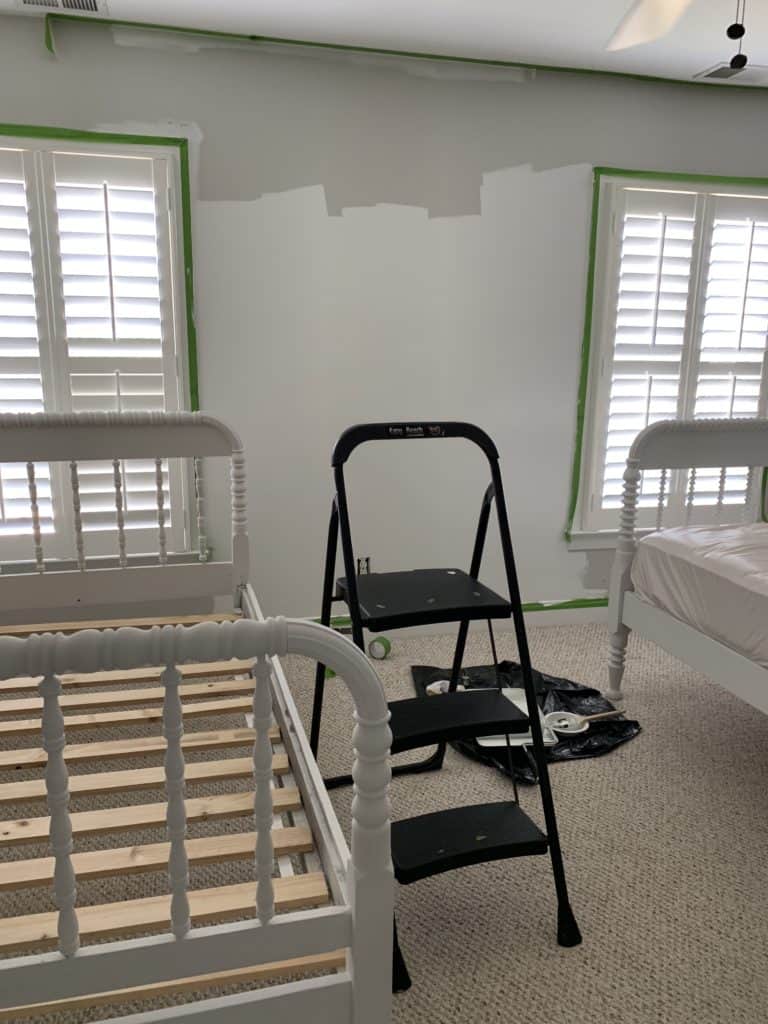
Before Pictures: The Guest Bedroom + Office Space Transformed into a Shared Bedroom


A lot of effort went into transforming this room into a little kid’s coastal oasis. I call it a “mini reveal” because I am still working on it. While we have two beds in the room, my daughter is still in the crib, smack in the middle of the room. We plan to move her to her big girl bed in the next few days, but we’re soaking up every last bit of her containment. She is a wild child but has not climbed out of the crib yet. I am itching to get the nursery finished, so I need her crib soon!
The Shared Bedroom Makeover Begins!

So what all went into this room? First, I painted it white (paint details at the end). I found two Jenny Lind style beds at Habitat for Humanity Restore. I dabbled with stripping and sanding the beds, but in the end decided that was too much work. Then I borrowed a paint sprayer and failed miserably at spraying the beds, so in the end, I hand painted them. I found a dresser on the Facebook Marketplace from the 1920’s and sanded it down to it’s raw and natural wood (DIY tutorial coming soon). Finally, I took an early 1800’s dresser from Habitat for Humanity Restore and sanded it down as well.
Read More: 50+ Wide Nightstand Options for Every Budget
Our decor is slowly coming together. I hope to add some personalized art and framed photos of the kids. I am also planning a long art exhibit, magnetic, and chalkboard wall in the dormer window. You will also see a chest that I converted into a “dress-up wardrobe” for both kids.
Shared Kid’s Bedroom Furniture Makeovers
Jenny Lind Beds for the Shared Kid’s Room

Have you ever heard of a “three quarter bed frame?” Well, it looks a lot like a full size bed, but it not quiet a full. It’s also larger than a twin, so somewhere between a twin and full. This is interesting when you’re trying to find a mattress to fit the bed frame. In the end, we found the perfect RV mattress on Amazon, along with great sheets to fit it. Another takeaway with these beds? Sooooo, soooo, so many spindles to paint. I was so over the spindles in the end, but I love the way they turned out.


Tutorial coming soon. Products used: Zinsser 3-in-1 Primer, Rustoleum Chalk Paint in Linen White, Polycrylic Clear Matte Sealant
1920’s Dresser Makeover for Shared Boy and Girl Bedroom

I sent my husband to pick up this dresser I found on Facebook Marketplace. When he brought it home, I quickly realized it had veneer (NOOOO, not again) and it turned into a time consuming project. It took a few weeks to sand it down but in the end, it’s gorgeous and was worth all of the work.


Tutorial coming soon. Products used: Ryobi Orbital Sander, Dremel 200, 60 grit sandpaper, 220 grit sandpaper, Polycrylic Clear Matte Sealant, Valspar Liming Wash.
Kid’s Bedroom Dress Up Wardrobe
This antique chest was passed down to us from my aunt and at some point in time it belonged to her husband’s family on a tobacco farm in Western North Carolina. The doors were in rough, rough shape, so I decided to remove those and leave it open for the kids. We also took the legs off so it would be at their height. I hope to lime wash the inside a bit, but I love the natural wood on the inside. I also plan to put some baskets in it, add cute hangers, and place a mirror on the side. My kid’s love it and I find my daughter dressing herself from it daily.


Tutorial coming soon.
Early 1800’s Bedroom Dresser

I purchased this early 1800’s dresser from Habitat for Humanity Restore. To date, it has been the easiest refinishing project. It was made prior to veneer popularity, so all I had to do was sand the finish off, seal it, and put a small amount of liming wash on it to get rid of the yellow tones. We did remove the glove boxes on top because they were rotting and could not be salvaged. A fun note? These nails helped narrow down the time period when I posted it to an antique furniture identification group. I think they’re awesome!


Tutorial coming soon. Products used: Ryobi Orbital Sander, Dremel 200, 60 grit sandpaper, 220 grit sandpaper, Polycrylic Clear Matte Sealant, Valspar Liming Wash.
Want to see more furniture makeovers? Don’t miss these posts!
- How to Sand, Bleach, and Whitewash Wood Furniture
- Refinishing and Bleaching Wood: My Heirloom Cedar Hope Chest
- Refinishing Furniture: The Provincial Dresser
- Removing Veneer & Refinishing Furniture
The Final Reveal: Shared Boy and Girl Bedroom!


I plan to give each of these pieces of furniture their own devoted post, this is just a short recap of what went into the room. I hope you love it as much as I do, and you can also find all of the sources and links here.


LOVE their shared room!! You are amazing!
Thank you Sally!
So gorgeous! Just wondering if you wired the sconces or are putting puck lights in them? I’m thinking of using these same ones and wonder if it works well? (To not wire these)
We did use the puck light trick and it works great. We have a lot of light from the windows. The puck lights do not put off a ton of light, so just be aware you will not get bright lights like you would from electricity.