Butcher Block Countertops

Our new butcher block countertops in the laundry room and how I sealed them for a natural look.
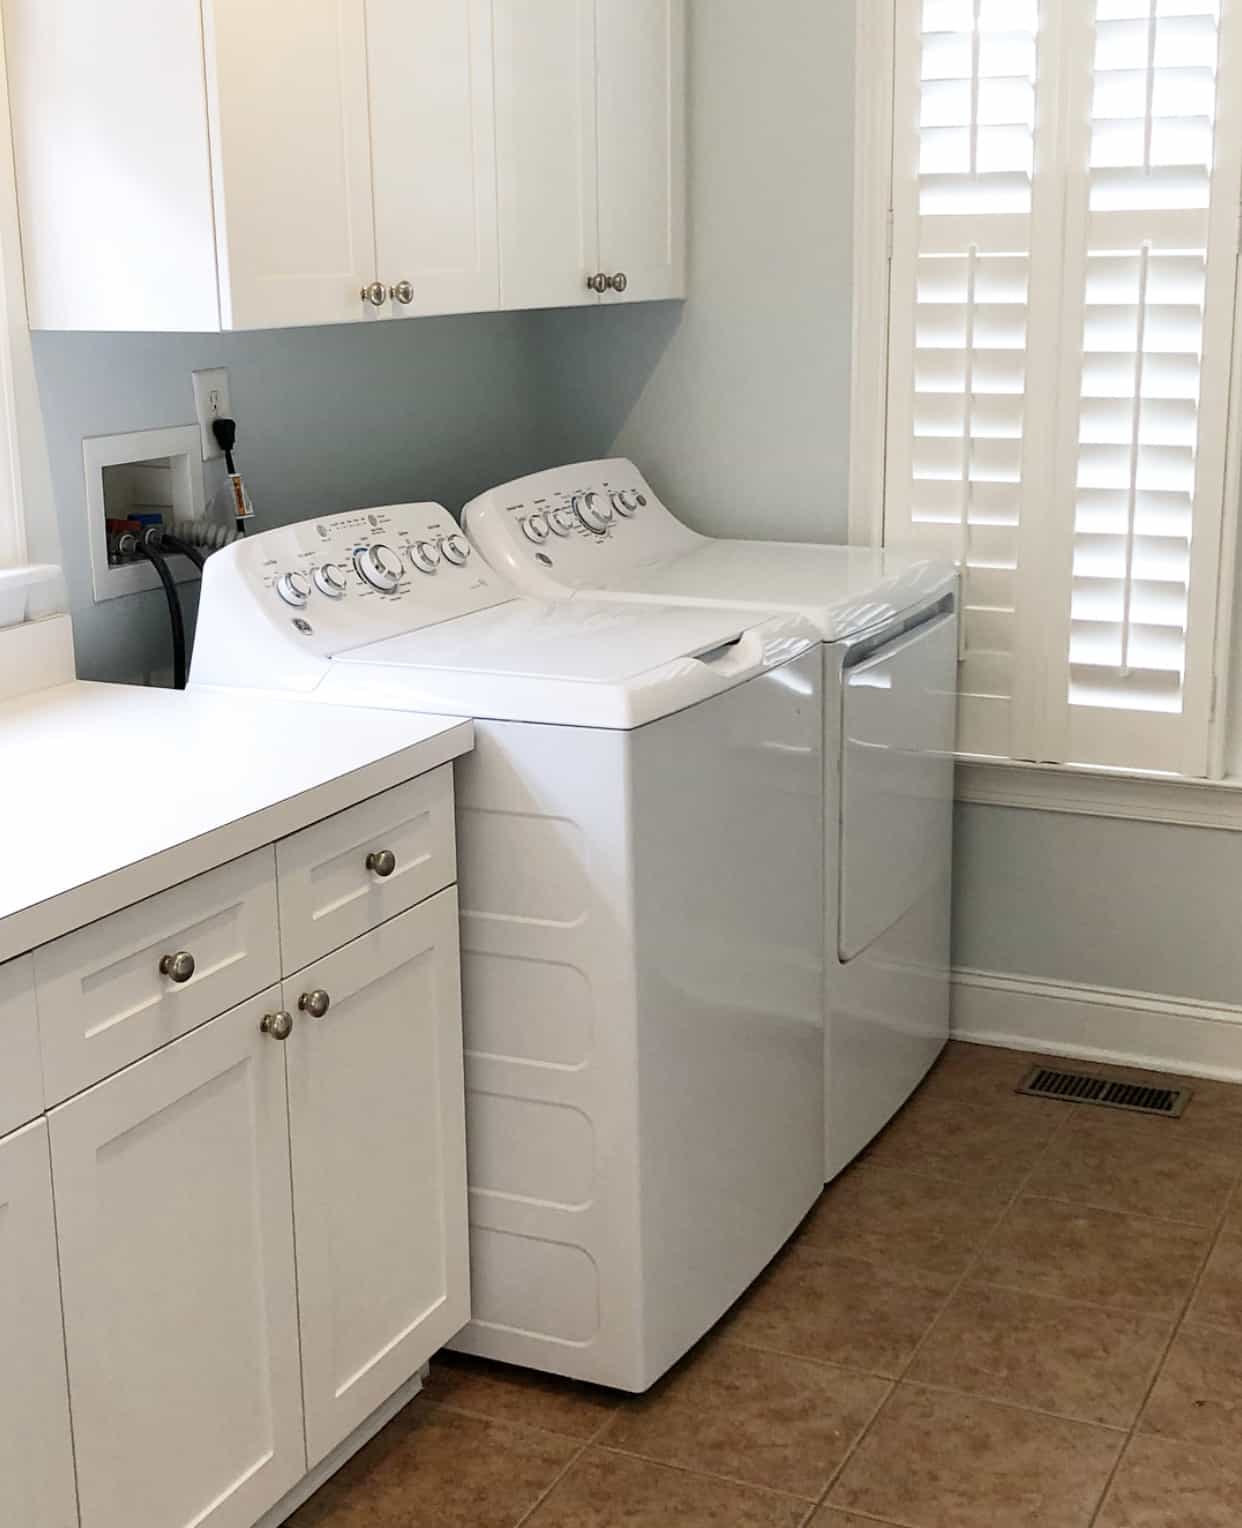
I recently shared our plans for a laundry room makeover, where my plans included painting the tile floors, replacing the countertop, painting the walls, and whitewashing a bamboo shade. I cannot believe the end results and I will reveal all of the details soon. Today, I’m sharing how I replaced the formica laminate countertop with a butcher block from Lowe’s Home Improvement, for less than $175.


This post contains affiliate links, where I will receive commission from your clicks and purchases. You can read more about my disclosures here.
Choosing a New Countertop for the Laundry Room
A few years ago, I painted the floors using a stencil. While I loved it at the the time, my decor has changed and I no longer wanted the bold print. I decided to paint the floors a solid color and that quickly spiraled into making over the entire laundry room. I considered making my own butcher block using plywood but I couldn’t get the look that I desired. Therefore, I started looking for a new countertop.

If you have been following me for a while, you know that I love natural and unfinished wood. I have refinished several pieces of furniture and I knew that I didn’t want a butcher block with `warm undertones. We are refinishing our wood floors soon to a natural white oak color and I wanted the countertop to compliment the future floors.
I found several budget friendly butcher blocks from Floor & Decor, IKEA, Home Depot, and Lowe’s Home Improvement. I narrowed them down to a beautiful Baltic Butcher Block Birch 6-ft Unfinished Countertop. I went with this countertop because the unfinished birch was less yellow and orange than the rest of the countertops.
Installing the Butcher Block Countertop in the Laundry Room
First, we removed the old countertop using this amazing tool, the Zenith Trim Puller. Then we installed the countertop. I asked my husband to help with this because the butcher block was heavy and awkward to cut. We needed a 5′ piece for our counters and this piece came in a 6′ section. We made two cuts using our miter saw. First, we marked 5′ and made the first cut. Then, we flipped it over and cut the opposite side. We did it this way because we do not own a table saw. Scott applied wood glue to attach it to the cabinets. Then using 2″ wood screws, we attached the countertop to the cabinets from the underneath. I do not have any photos of the process as I was helping him hold the piece but I do have videos saved to my highlights on Instagram.
Sealing the Butcher Block Countertop
Unfortunately when staining or sealing unfinished wood, you will end up with a darker piece of wood than desired. Applying stains and topcoats to wood often make them look wet or leave a glazed appearance. I remembered a recommendation from several other bloggers and ordered General Finishes Flat Out Flat Topcoat. I decided to skip staining the countertop because I loved the natural color. Then I performed the following steps to seal the countertop.

Steps for Sealing the Butcher Block Countertop
- Lightly sand with a 220-grit foam sanding pad.
- Wipe clean and confirm all dust and debris are removed.
- Condition with Minwax Water Based Wood Conditioner.
- Using a brush, brush on one thin application of General Finishes Flat Out Flat Topcoat. Avoid picking up and putting down your brush multiple times to avoid brushstrokes. Let dry for at least 2 hours.
- Repeat steps 1&2.
- Apply another application of top coat and repeat steps 1&2.
You can read more about General Finishes Topcoats here, with several instructions and FAQs.
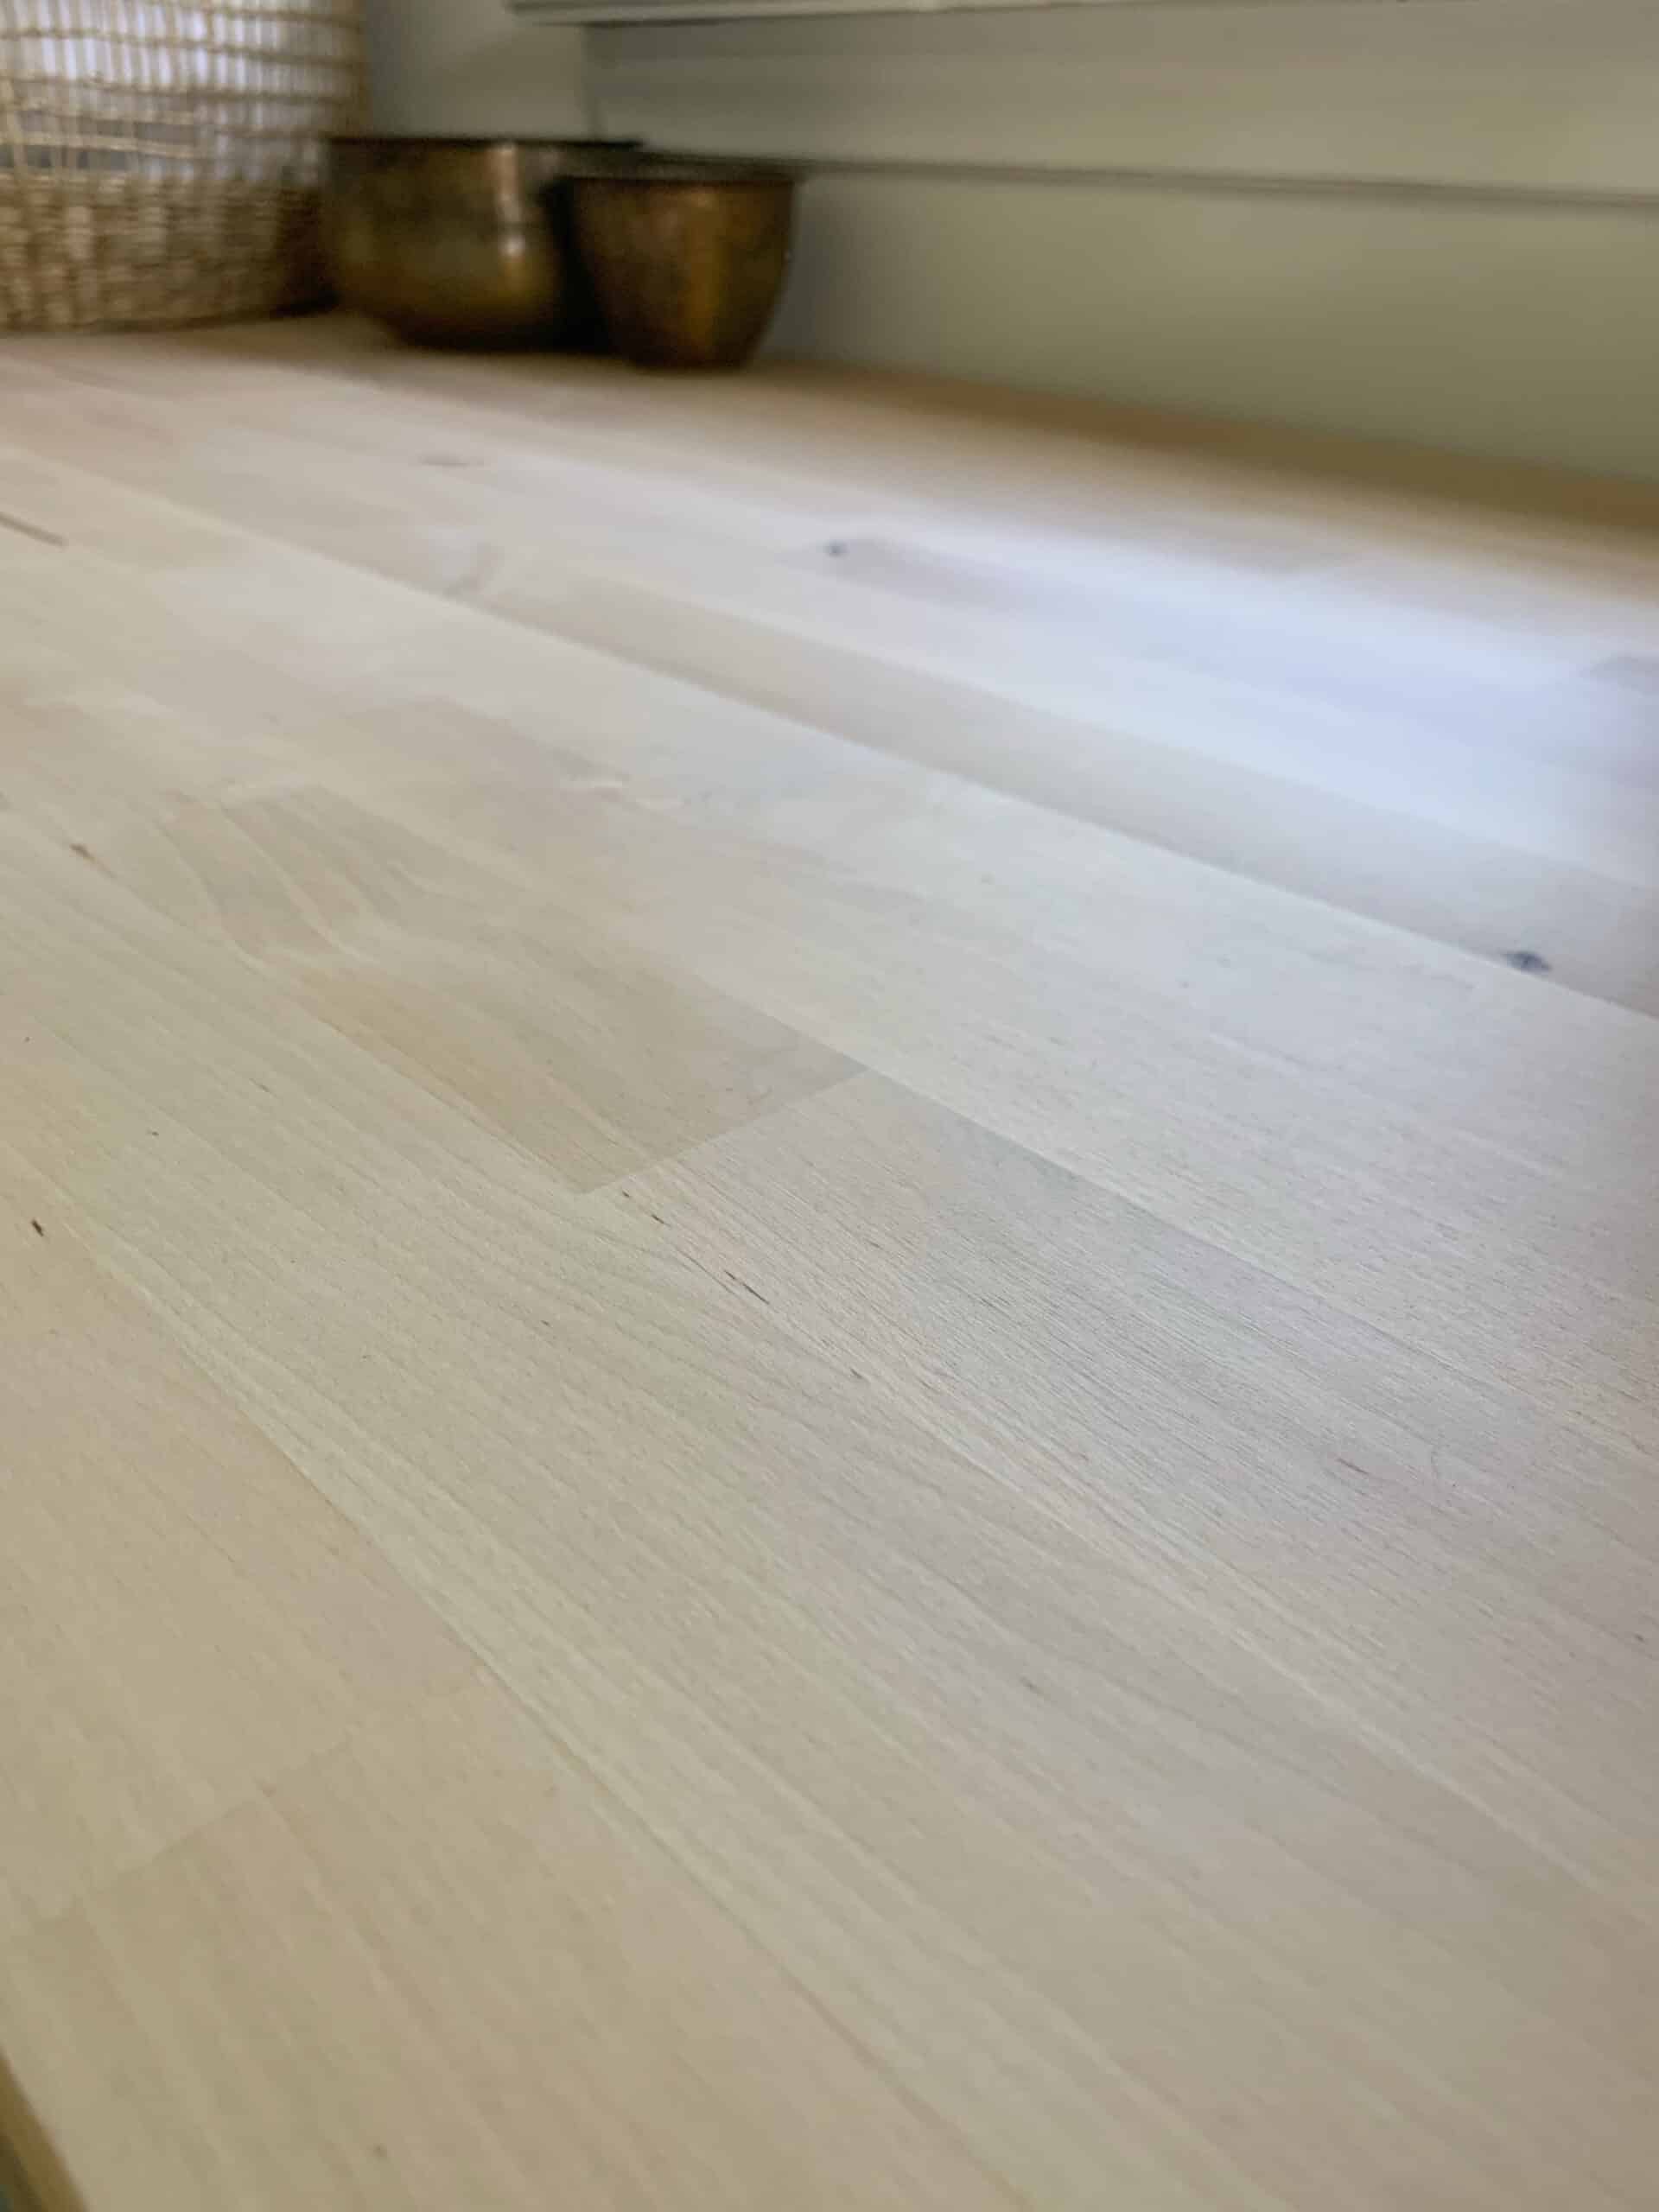
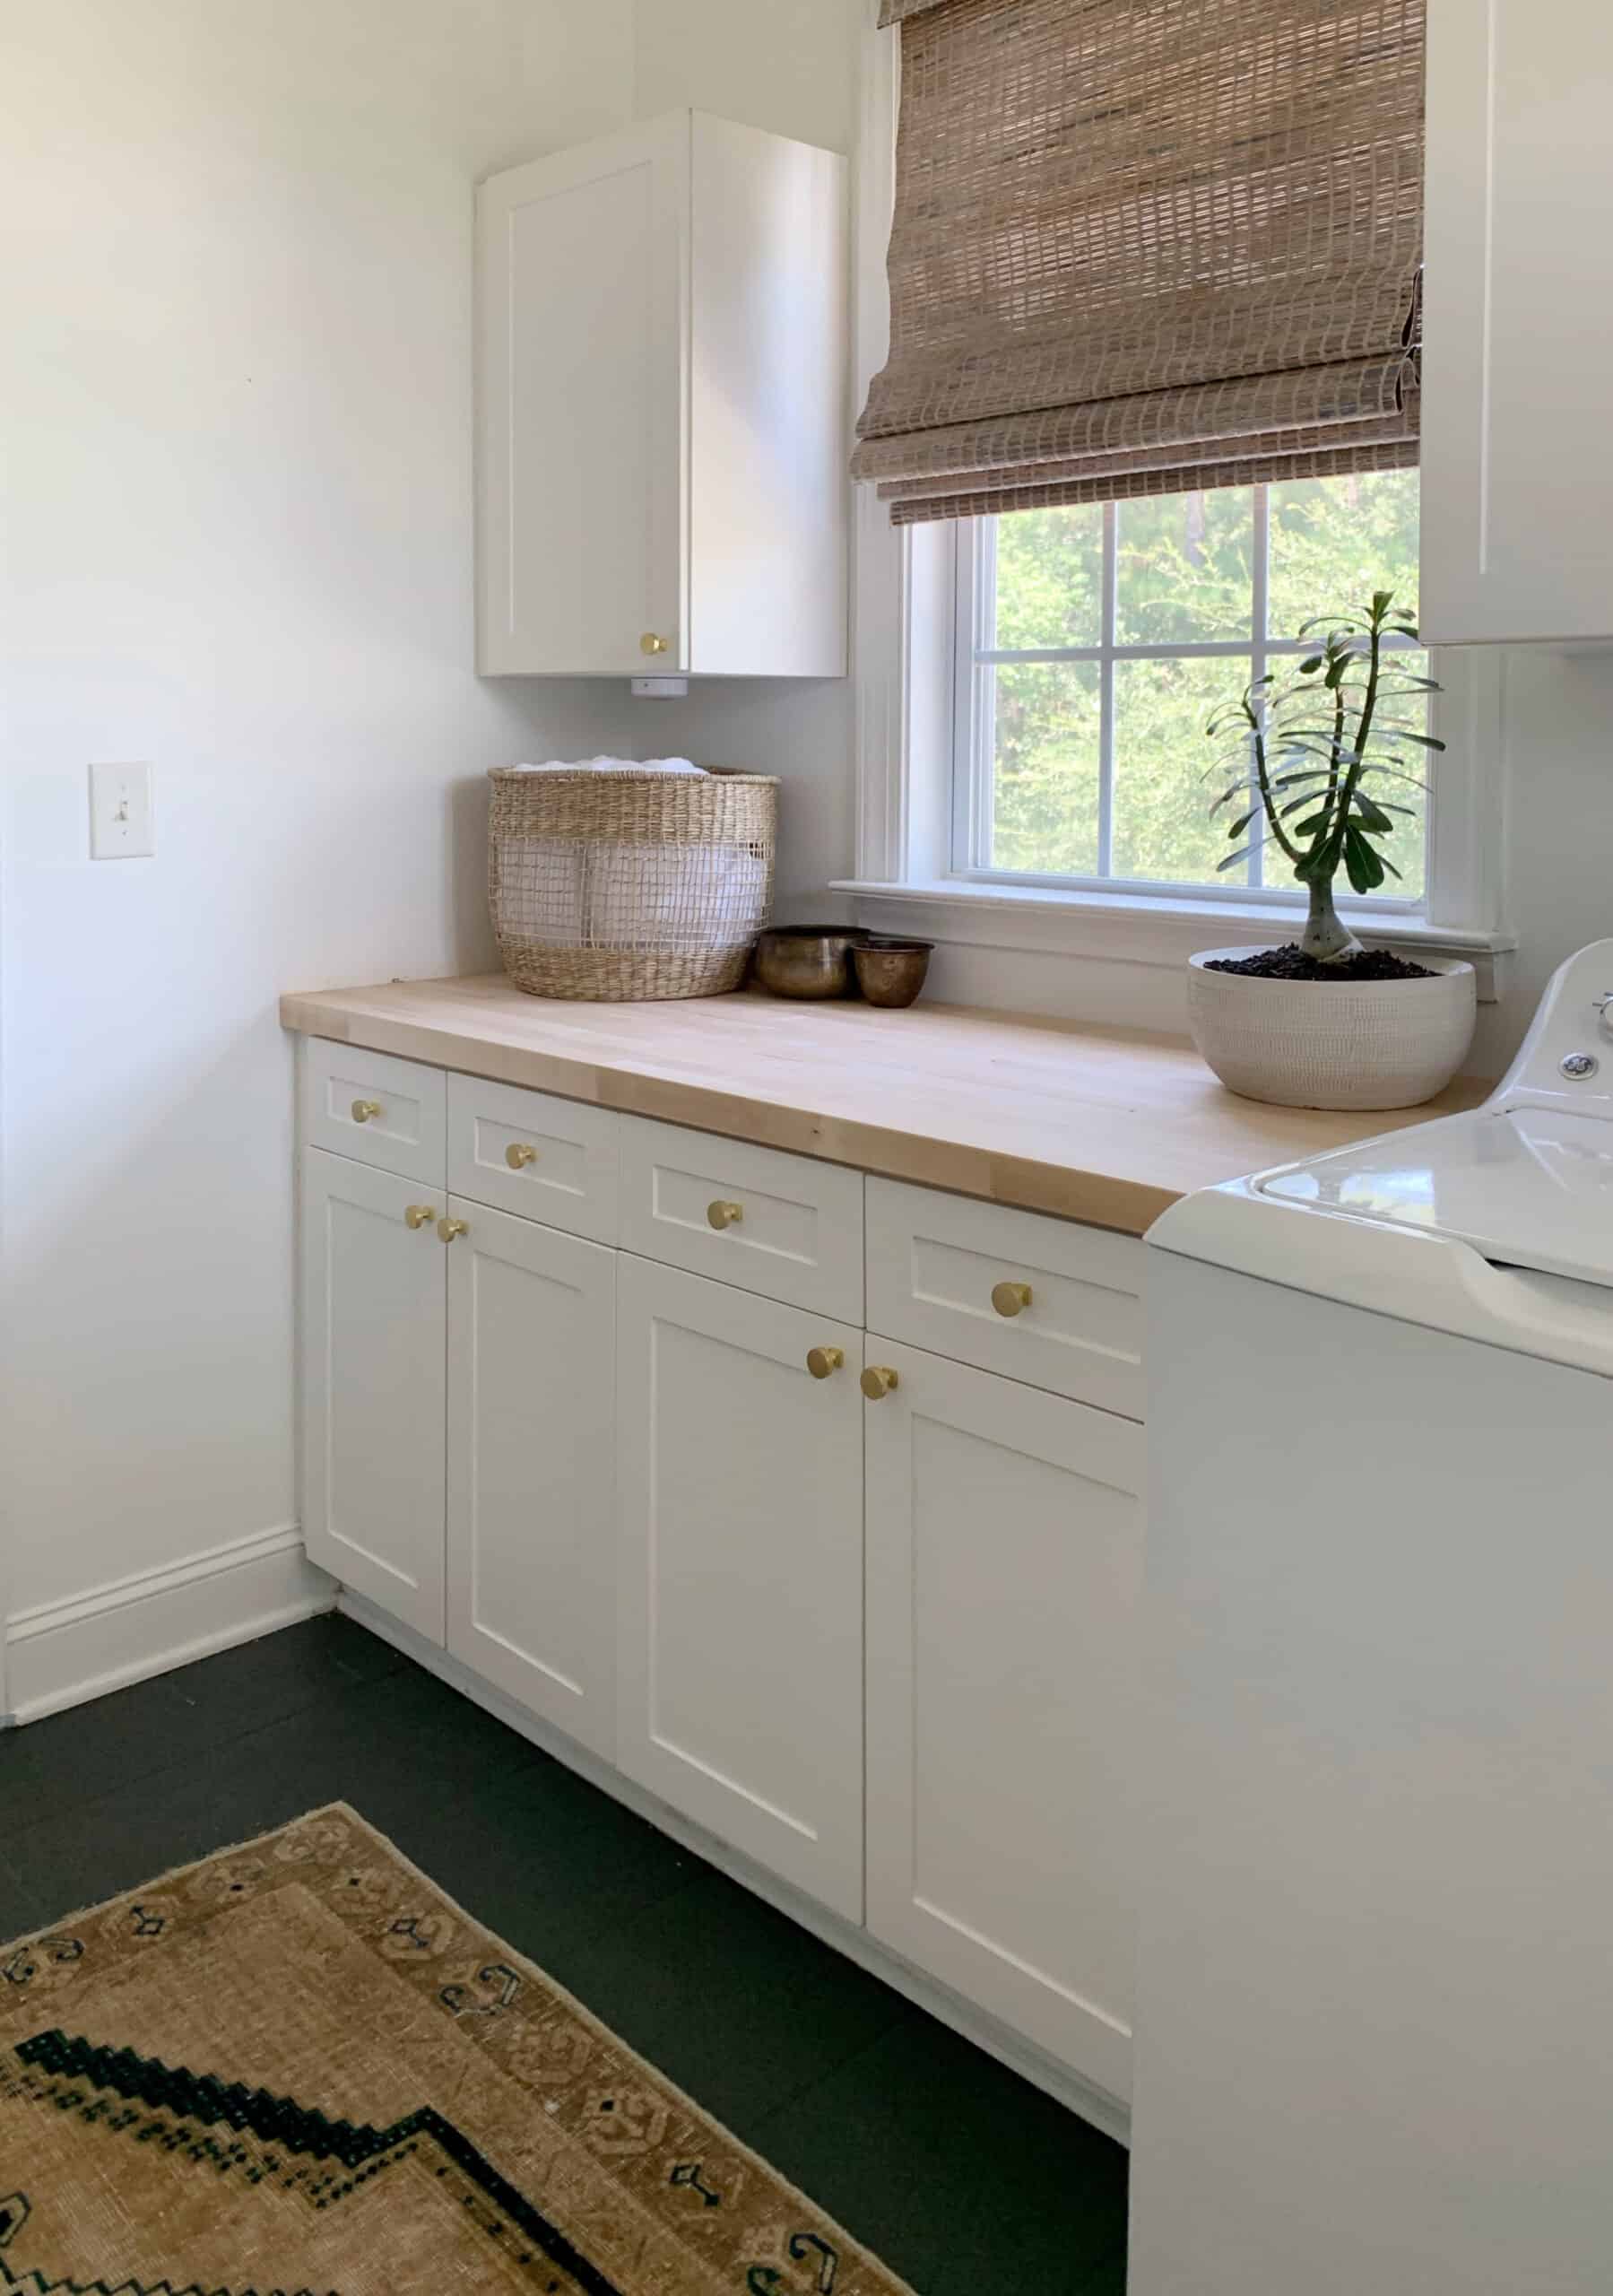
I cannot believe how beautiful this piece is and how the topcoat did not alter the color at all. It looks natural with no shine or brushstrokes. My only piece of advise and concern? If you plan on using this in a highly used area like a kitchen or next to a sink, you will need to contact General Finishes to find out if this is right product for you. We are simply using it as a folding station in our laundry room and I’m not concerned about water damage.
Our New Lundry Room Butcher Block Countertop

I absolutely love the butcher block and how it looks in our laundry room. I haven’t experienced a spill or anything wet on the countertop yet. I simply use it for folding clothes and I continue to use caution when using cleaning agents or pouring laundry detergent around it. I will update this post as we live with it. Are you considering a butcher block countertop? I would love to know if you use this method and how it works for you!

Find more home renovation inspiration in these posts below!
- Installing Zellige Tile
- Large Gallery Wall Using Ikea Ribba Picture Frames
- GE Ultrafresh Washer and Dryer Review
You will find more information here about using General Finishes Flat Out Flat Topcoat in your home and products that might work better for high traffic areas, like kitchens and countertops near water.


You are so talented! Love watching all of your transformations!
Thank you so much!
Beautiful! You did a wonderful job ? May I ask what paint and color you used on the floor? Thank you!
Thank you, the paint is Rustoleum Floor Tile Paint in Charcoal Grey!
Hi the countertop came out beautiful I love the natural look. I am going to try your directions. What kind of brush did you use?
Thanks!