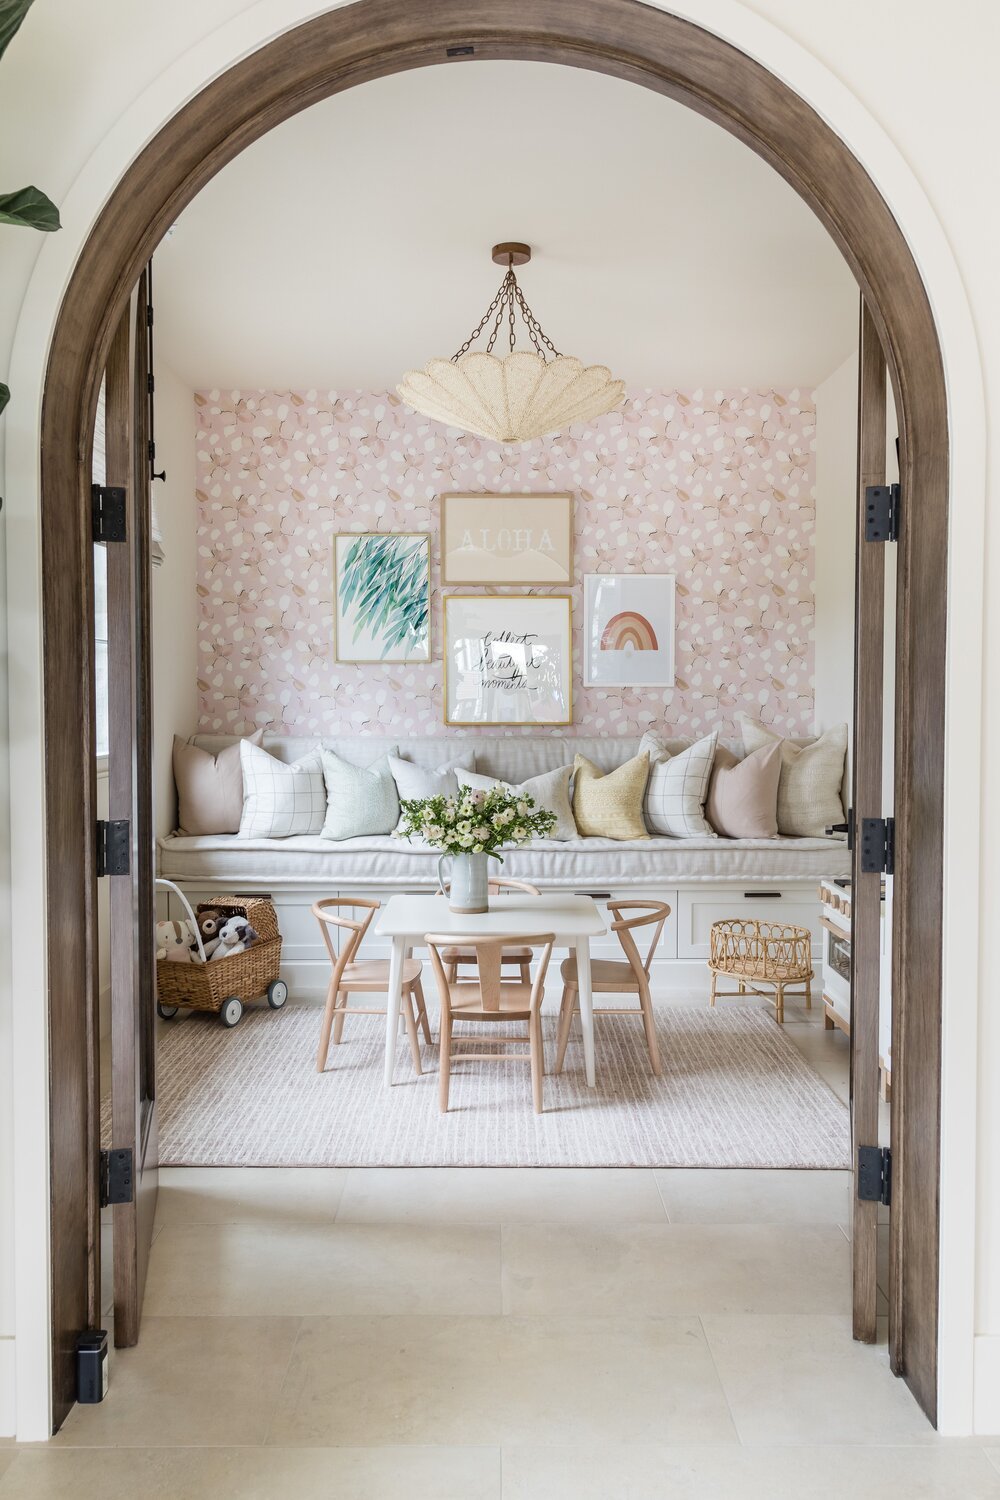
DIY Stamped Wall that Looks Like Wallpaper
Wallpaper has been on trend for several years and it can be found in several homes. Wallpaper is also expensive and the cost of using it can add up quickly. I’m sharing how to order a custom stamp and create your own DIY stamped wall that looks just like wallpaper.
This post contains affiliate links for your shopping convenience. Click here to read my full disclosure policy.
While I love white walls, one wall in our playroom felt so incomplete. I debated adding millwork but ultimately found myself researching wallpaper. I had an image in my mind of what I wanted but I couldn’t find a wallpaper design that I loved. So I started thinking about how I could create it myself and that’s how the diy stamped wall came to life. I’ve seen sponge walls and freehanded murals, but repetitive patterns stamped on the wall? Nope. Then I scoured the internet for coastal stamps but everything was nautical and belonged in a scrapbook. I finally found a shop on Etsy that creates custom stamps with access to a large selection of images. Want to learn how to stamp a wall? All ideas are possible with a little imagination.
How to Create a DIY Stamped Wall
Selecting a Custom Stamp
There are a few things to keep in mind when selecting a stamp. Do you want a small repeating pattern? Or a large and spaced out pattern? Also, do you want it to look sketched or solid? When you look through the image library for the custom stamp, these are things to think about. For me, I preferred the organic appearance of a sketched look.
Tips + Tricks for Wall Stamping
Practice on poster boards and hang them on the wall to determine the spacing you prefer. Avoid getting too much paint on your stamp, you will end up with smudges if it’s too applied too thick. Create a spacer and use it to guarantee that you have the pattern evenly spaced.
Mistakes I Made When Creating the DIY Stamped Wall
I made the mistake of rushing the project and I lost track of my spacing technique. Repeat after me, do not do this. Make sure you space the stamp evenly throughout the process. A few mistakes will happen and that’s fine, but an entire row that is not spaced correctly will stand out.

If you make a mistake, you can paint over it and stamp it again. However, avoid what happened to me and know the exact color of the walls. I made the mistake of painting over a few stamps with the wrong color of white and had to paint over the entire wall, then stamp the wall again.
Items Used for Stamping the Wall
- I ordered this 4″x4″ stamp.
- I used this paint in Blissful Blue (this color is unavailable, but here’s a similar shade)
Walls are painted Extra White by Sherwin Williams.
Steps for Creating the Stamped Wall
- Determine spacing for the stamped pattern. I tested several spacing ideas on poster board until I found a repeating pattern that I liked. Then I used a spacer aka a toy lid. Another option, go through and mark where the top of the stamp will hit.
- Apply paint to stamp with a roller. It helps to squirt the paint on a surface (I used poster board), then roll a small amount of paint on the roller first.
- In one solid motion, firmly place the stamp on the wall. Then use a spacer and continue down the line.
- Reapply paint with a roller and repeat until finished.
- If you find yourself with areas that the stamp will not fit, wait until the end and slice the stamp from the wood backing. Then you can maneuver the stamp to fit in tough to reach spaces.
DIY Stamped Wall

If you want to replicate the look of wallpaper at a fraction of the cost, try this DIY stamped wall method! I created this sailboat stamp for a fun accent wall in our kids' playroom. Learn how I did it.
Instructions
- Determine spacing for the stamped pattern. I tested several
spacing ideas on poster board until I found a repeating pattern that I liked. Then I used a spacer aka a toy lid. Another option, go through and mark where the top of the stamp will hit. - Apply paint to stamp with a roller. It helps to squirt the paint on a surface (I used poster board), then roll a small amount of paint on
the roller first. - In one solid motion, firmly place the stamp on the wall. Then use a spacer and continue down the line.
- Reapply paint with a roller and repeat until finished.
- If you find yourself with areas that the stamp will not fit, wait until the end and slice the stamp from the wood backing. Then you can maneuver the stamp to fit in tough to reach spaces.
What do you think? I love how it turned out! It’s unique and looks like real wallpaper. The best part? I can easily change it when we grow tired of the pattern! Happy stamping!
Check out more playroom projects here:
- Our Rocker Balance Board and Why it’s Our Favorite Toy
- Coastal Playroom Inspiration with Serena & Lily
- Coastal Inspired Playroom – Splurge & Save


