DIY Raised Garden Beds – How to Build Your Own

I started writing this raised garden beds post several weeks ago when it was still acceptable to shop in the stores. It is not recommended to go out shopping for all of these items now. You will notice that I have tried my best to include items that are available for shipping online and I encourage checking with your local nurseries to ask for delivery. There are several ways to purchase plants online and I will link those at the end of this post. I hope you are all staying healthy and safe!
This post contains affiliate links, which means I may receive commissions from your clicks or purchases. You can read my full disclosures here.
Raised Garden Beds for Our Backyard Garden
While practicing social distancing, I found myself skimming ideas online for garden beds. I grew up helping my papaw on the farm and some of my fondest memories are sitting on the porch swing and snapping green beans together. In an effort to put down my phone, stop checking for news updates, and ways to distract my anxious mind, I planned for our first garden. I started small and ended up big, but that is my DIY nature and I’m here to share our project with you!

Originally I wanted a small square foot garden, with a few basics like tomatoes, peppers, and herbs. When I bounced the idea off of Scott, he showed me lumber in the garage and said we could make a rectangular garden bed. I loved this idea because it would sit perfectly in the full sun, along the back of our house. When I started walking around the garden center, I saw so many varieties of tomatoes, peppers, and cucumbers. Then I found the squash and zucchini. But wait, don’t forget the strawberries, because who doesn’t want strawberries? Then I walked down through the herb section and I quickly became a modern-day Claire Fraser of Outlander, dreaming up elixirs and herbal teas in my mind. Finally, I found myself ordering pollinator flower seeds and pole beans because clearly, I want to sit on my porch and snap beans, just like the old days!
Therefore, we built two large rectangular boxes and one square box. Holy cow, I went from one tiny square garden to three garden boxes in no time. I secretly want one more but shh, don’t tell Scott. Now I’m researching canning options because there is no way this family will eat our entire harvest!
How to Build DIY Raised Garden Beds
Raised Garden Bed Building Supplies
- (3) 2 in. x 6 in. x 8 ft. #2 Prime Ground Contact Pressure-Treated Lumber per rectangular garden bed
- #8 x 2-1/2 in. Philips Bugle-Head Coarse Thread Sharp Point Polymer Coated Exterior Screws
- #11 x 1-1/4 in. Electro-Galvanized Steel Roofing Nails
Gardening Supplies
- #30 x 190 ft. Twisted Jute Twine, Natural
- (2) 6 in. T-Labels (10-Pack)
- (6) 2 cu. ft. All Natural Raised Bed and Potting Mix Premium Outdoor Container Mix
- (4) 40 lbs. Mushroom Compost
- (4) Premium 0.75 cu. ft. Top soil
- Wheat Straw
- (2) Garden Architecture 48- in Heavy Duty Folding Trellis
- (2) 6 ft. Bamboo Garden Stakes (6-Pack)
- 54-in Powder-Coated Galvanized Steel Wire Round Tomato Cage
Garden Fence Supplies
- 7 ft. x 100 ft. Polypropylene Deer Block Netting, UV Treated
- 5 ft. Wooden Garden Stake
- Staple Gun & Staples
Please note, we used treated lumber because it is what we had on hand in our garage. Most gardeners prefer cedar and lumber that is not treated to avoid chemicals released into the soil over time. This is a personal preference and we felt the lumber is safe enough to use for this project. Please use your own discretion when selecting wood for your raised garden beds.
DIY Raised Garden Bed Instructions
- Step 1: Using a miter saw, cut one 2 in. x 6 in x 8 ft board into (2) 4 ft pieces.
- Step 2: Attach one 2 in x 6 in x 8 ft board to one 4 ft section, like a “L” shape. Assemble by placing the boards at a right angle and inserting two #8 x 2-1/2 in screws.
- Step 3: Repeat step 2 by assembling the other side at a right angle.
- Step 4: Attach the remaining 4 ft board to complete the rectangle.
Please note: Several tutorials recommend adding additional lumber for more support in the corners, but we did not have any on hand. You can find more DIY garden bed tutorials here.


How to Build DIY Raised Garden Beds

Want to add some gardens to your backyard? Here's how to make easy DIY raised garden beds. These garden beds are kid-friendly and the perfect way to start your own easy at-home garden!
Materials
Raised Garden Bed Building Supplies
- (3) 2 in. x 6 in. x 8 ft. #2 Prime Ground Contact Pressure-Treated Lumber per rectangular garden bed
- #8 x 2-1/2 in. Philips Bugle-Head Coarse Thread Sharp Point Polymer Coated Exterior Screws
- #11 x 1-1/4 in. Electro-Galvanized Steel Roofing Nails
Gardening Supplies
- #30 x 190 ft. Twisted Jute Twine, Natural
- (2) 6 in. T-Labels (10-Pack)
- (6) 2 cu. ft. All Natural Raised Bed and Potting Mix Premium Outdoor Container Mix
- (4) 40 lbs. Mushroom Compost
- (4) Premium 0.75 cu. ft. Top soil
- Wheat Straw
- (2) Garden Architecture 48- in Heavy Duty Folding Trellis
- (2) 6 ft. Bamboo Garden Stakes (6-Pack)
- 54-in Powder-Coated Galvanized Steel Wire Round Tomato Cage
Garden Fence Supplies
Instructions
Step 1: Using a miter saw, cut one 2 in. x6 in x 8 ft board into (2) 4 ft pieces.
Step 2: Attach one 2 in x 6 in x 8 ft board to one 4 ft section, like a "L" shape. Assemble by placing the boards at a right angle and inserting two #8 x 2-1/2 in screws.
Step 3: Repeat step 2 by assembling the other side at a right angle.
Step 4: Attach the remaining 4 ft board to complete the rectangle.
What We Planted in our Raised Garden Beds
When planning your garden, know your zone and sun coverage. Keep in mind the direction of the sunrise and sunset, time of the year, and any obstructions like a house or tree that might create shade. Also, some plants will grow vertically and cause more shade, so you will want to plan accordingly. You can type in your zip code and figure out your zone here.

Here is a diagram of our raised garden bed. Please notice that I staggered our peppers and tomatoes to give them optimal room as they grow. I also placed things like purple kale purposely next to them, because they will be more shaded. After planting, I read that tomatoes and strawberries should not be grown next to each other due to the potential spread of pests and plant disease between the two. Therefore, I asked for advice on Instagram and several seasoned gardeners eased my concern and said they’ve never had a problem with the two planted next to each other.
Raised Garden Bed Plot Designs for Fruits, Vegetables, & More
- Chives
- Zinnia
- Salsa Roma Tomato – (Determinate – Cage)
- Cosmos
- Marigold + Giant Marconi Sweet Pepper (Stakes)
- Patio Tomato – (Determinate – Cage)
- Purple Kale
- Quinalt Strawberry
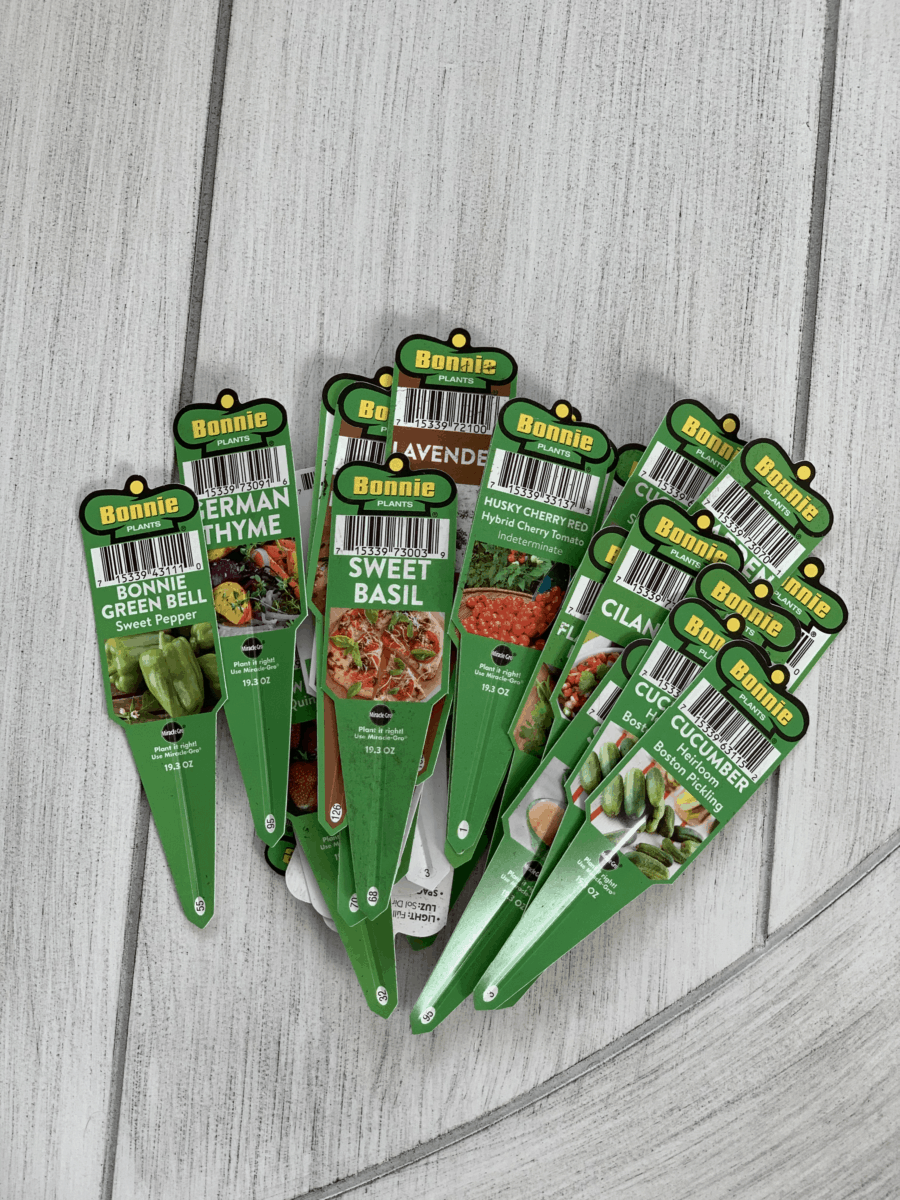
- Bonnie Green Bell Sweet Pepper
- Purple Kale
- Genuwine Beefsteak Tomato (Indeterminate – Stakes) + Cosmos
- Quinalt Strawberry
- Marigold + Sun Sugar Tomato – (Indeterminate – Stakes)
- Husky Cherry Red Tomato (Indeterminate – Stakes)
- Husky Cherry Red Tomato (Indeterminate – Stakes)
- Quinalt Strawberry
- Straight Eight Cucumber
- Straight Eight Cucumber
- Heirloom Boston Pickling Cucumber
- Heirloom Boston Pickling Cucumber
- Blue Lake Green Beans
- Blue Lake Green Beans
- Blue Lake Green Beans
- Blue Lake Green Beans
- Squash
- Zucchini
- Red Bell Sweet Pepper
- Marigold
- Zinnia
- Purple Coneflower – Echinacea
- Squash
- Yellow Bell Sweet Pepper
- Fernleaf Dill
- Zinnia
- Garden Sage
- Bonnie Green Bell Sweet Pepper
- Rosemary
- Lavender
- Flat Italian Parsley
- Marigold
- Cilantro
- Cosmos
- Citronella
- German Thyme
- Greek Oregano
- Sweet Basil
- Sweet Mint
I used nails and twine to rope off sections and plan for the planting. Most of my plants were already started and purchased from Home Depot and Lowes with the exception of flowers and beans. I plan on trying seeds for most of the plants next year but I did use seeds for pole beans and zinnias this year.


Ground Cover + Soil for the Garden Beds
There are several methods for creating a ground cover inside of your garden box. First, I put down landscape fabric to kill the grass and weeds. Several followers sent messages discouraging landscape fabric because it can limit root growth. I pulled that up and used newspapers instead. When I ran out of newspaper and used brown paper grocery bags in the second bed. Why newspaper and brown paper? These methods will kill the grass and naturally compost over time, allowing room for the plant roots to grow.


I opted for an organic soil mixture for raised garden beds, mushroom compost, and topsoil. Our mixture consists of 50% All Natural Raised Bed and Potting Mix Premium Outdoor Container Mix, 25% Garden and Landscape Mushroom Compost, and 25% Scotts Premium Organic Topsoil. Finally, we topped the soil with Wheat Straw.
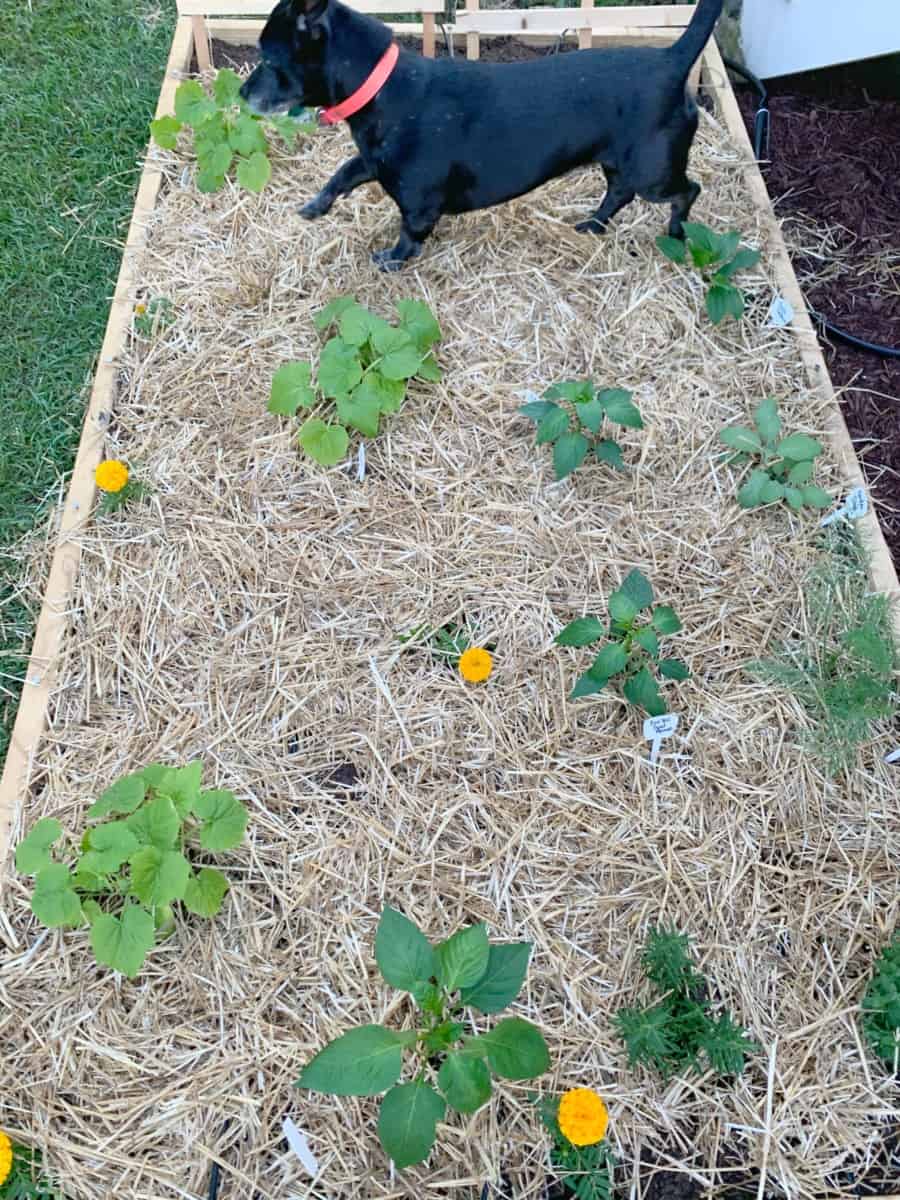
UPDATE: As of 4/11/2020, we removed the wheat straw because it had seeds and was sprouting weeds in the garden. I no longer recommend straw or hay. We will use MULCH or PINE STRAW moving forward.


More About the Garden and Raised Garden Beds
We purchased two trellises and placed them in a pyramid shape between the beds. On one side, we planted cucumbers and on the other, blue lake pole green beans. You will also notice that we used a large portion of the second garden box for the squash and zucchini. These will sprawl out and take up a lot of room, so we planted them far apart.

We had extra lumber so we incorporated a third square box under our stairs. The space gets several hours of sun but it does get a few hours of shade. We placed the cilantro where it will get the most shade. We also planted the mint in it’s own container because it can easily take over your garden.
Finally, you will notice that we planted several flowers in various spots. Some of these are to deter deer and rabbits. Most of them are to attract bees and other pollinators to the garden.
Determinate and Indeterminate
You will notice that I included “determinate” and “indeterminate” next to the tomatoes. I consulted with a friend and she recommended planting my tomatoes based on their growth habit. Determinate tomatoes reach a certain height and stop growing. It is recommended to use a cage for the determinate tomatoes. The indeterminate tomatoes continue to grow with tomatoes throughout their branches, growing really tall, thrive with pruning, and require a strong trellis or stake for support.

Dripworks
My neighbor recommended a drip line for irrigation. We have sprinkler irrigation and she said to avoid using those and spraying with a hose. Why do you want to avoid watering with a hose and sprinklers? It is super hot and humid where we live. Frequently spraying water on the leaves can lead to plant disease. Using a drip line irrigation prevents soil erosion and nutrient runoff. You can read more about the benefits of drip irrigation here.


Animal Fence
Number one animal to keep out of the garden? This wild beast, Mercy the Labrador and Bassett mix. I’ve already caught her curled up on top of the soil like it’s a dog bed and digging her nose in one corner. She has been known to eat tomatoes directly from the plants and go digging in the soil. We already have a backyard fence but we know that deer can jump that fence. Also, rabbits and other animals can squeeze through the posts. We opted for 7′ Polypropylene Deer Block Netting and wood garden stakes. Unfortunately, the stakes we purchased were not strong enough and my daughter already knocked one side down. We are currently installing stronger posts like these here.

Installing a Chicken Wire Fence Around our Raised Garden Beds
First, we inserted wood stakes into the ground with a rubber mallet. I went around with the deer fencing and pulled it as tight as possible. Then I used our staple gun to staple the fencing to the posts. Finally, I made a removable stake at one side of the garden so I can go in and out of the space. In conclusion, one of my biggest tips is to leave enough room between the garden beds and fencing to allow for walking and gardening. Also, use stronger stakes than those pictured in this post. I have linked better garden stakes above and here.


Purchase Garden Beds and Plants Online
In the end, are you up for building your own raised garden beds? Did you answer no? I’m linking several options online below. I’m also linking plants that are available online as well.

I hope you found this post informative! We are total amateurs at gardening but we put several hours into this project and I hope our experiences are helpful for you! Happy planting!
Don’t miss more gardening posts below!
- How to Care for White Wedding Hydrangeas
- Window Box Plants for your Southern Home
- 27 Plants for the Perfect Southern Porch
- DIY Raised Garden Beds – Ten Tutorials